Jekyll, Gitea, and CTFreak

I’m probably going to do a long writeup on how I write posts for Jekyll and have them automagically end up on the site. However, I figured a better starting point is explaining how these posts get from the text file created in Visual Code Studio all the way to the deployed website.
Unfortunately, this article won’t tell you how to get Jekyll downloaded to your computer, how to install Gitea or CTFreak, configured Docker and those kinds of things. I will get around to those later, but I want to keep the size of this post to a manageable size.
Jekyll
Jekyll is a very, very nice platform for writing simple articles. Not too fancy, not too complicated (other than the Ruby install kicking my ass everytime for some odd reason), and the end result is a static website that you host with something like nginx. No need for a database, just a directory of files.
Since I serve the files from a computer that isn’t the one I’m writing this post on, I need to get the final built version of the site to the right directory on the right computer. This isn’t too difficult either as a few commands will build the files and copy them where they need to go.
1
2
3
cd /home/jweatherly/jtb-blog
JEKYLL_ENV=production bundle exec jekyll build
rsync -avz _site/. /var/www/html
This works perfectly. I make my post, save it, and then when I’m done I just build the site and copy the changes over to the directory I’m serving the website out of…
We can do better.
Gitea
Pushing the Boulder
So, instead of just keeping all this stuff in a random directory on a random machine, why not use git to handle managing all the changes and stuff? I mean, this would make things easier as I’m no longer tied to that random machine to do all of my articles. Plus, if I make a huge mistake or write something absolutely wretched I can just roll it back and pretend it never happened.
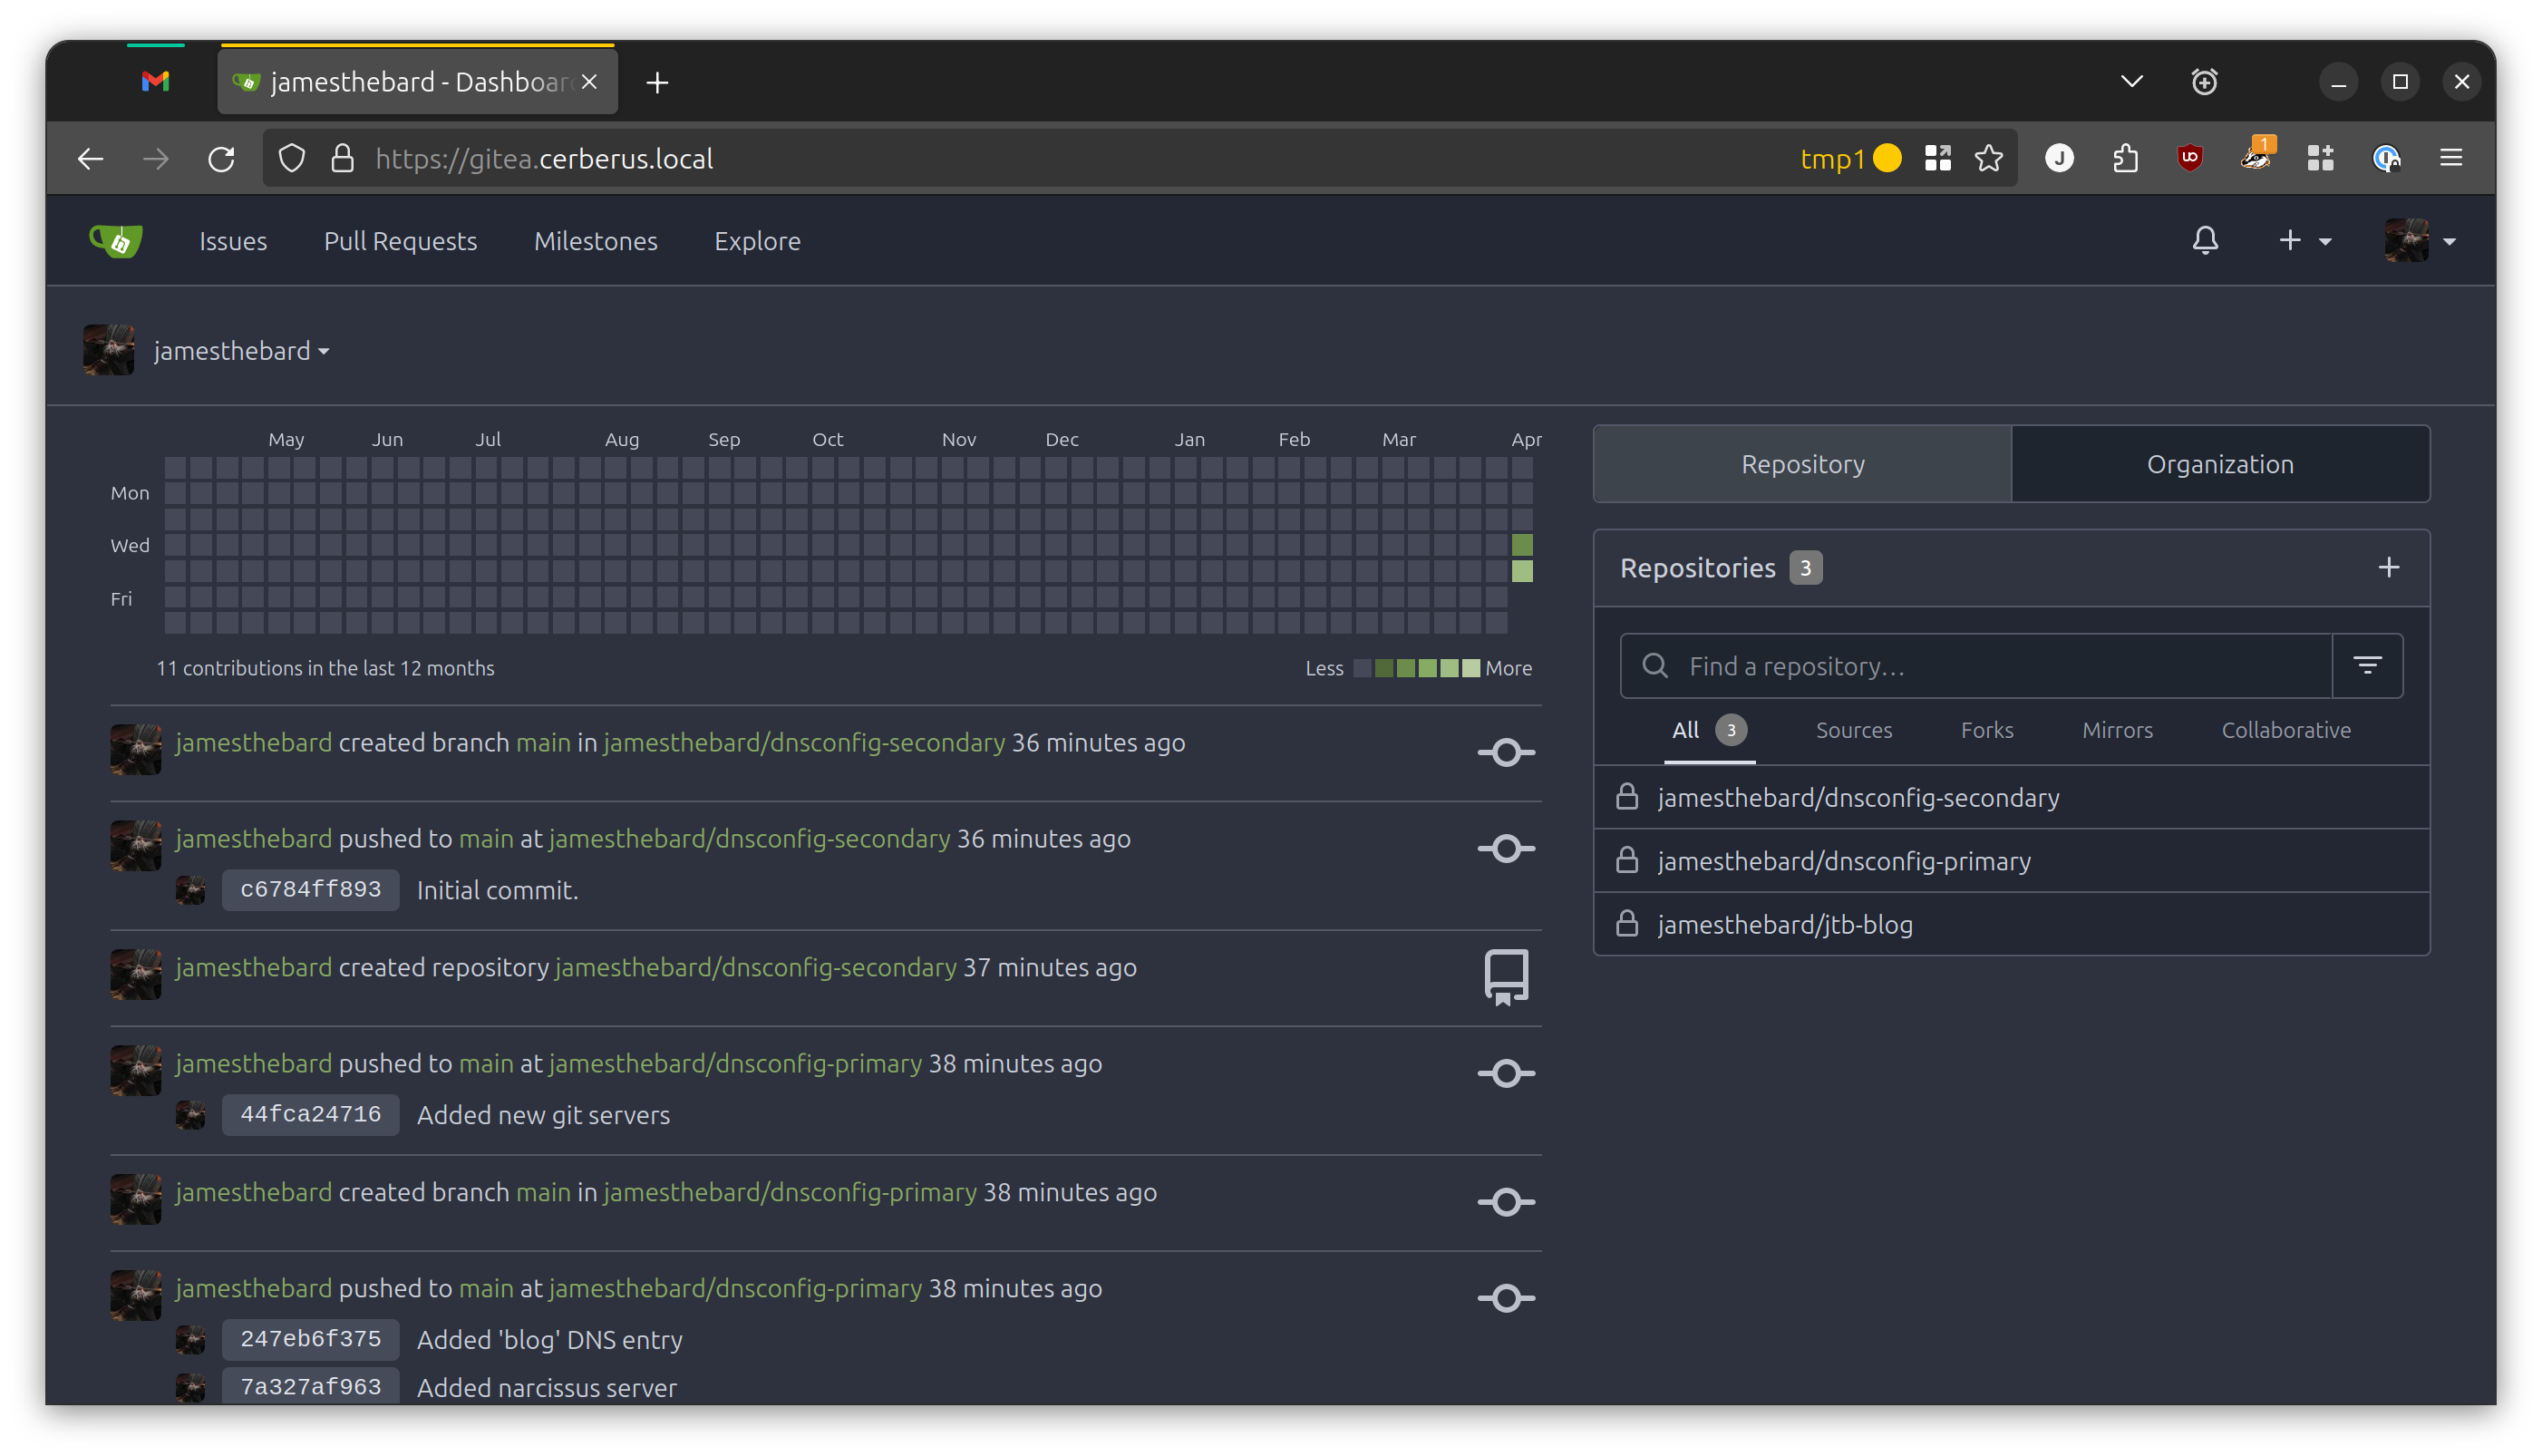
I’m using Gitea to host my assortment of posts, pictures, and code that builds my website. This adds a slight bit of complexity, but it gains me a ton of flexibility and some very, very useful features that we can use later.
So, I created the repository in Gitea, then placed all the files under git control.
1
2
3
4
5
6
cd /home/jweatherly/jtb-blog
git init -b main
git config user.name "JamesTheBard"
git config user.email "[email protected]"
git add .
git commit -m "Initial commit."
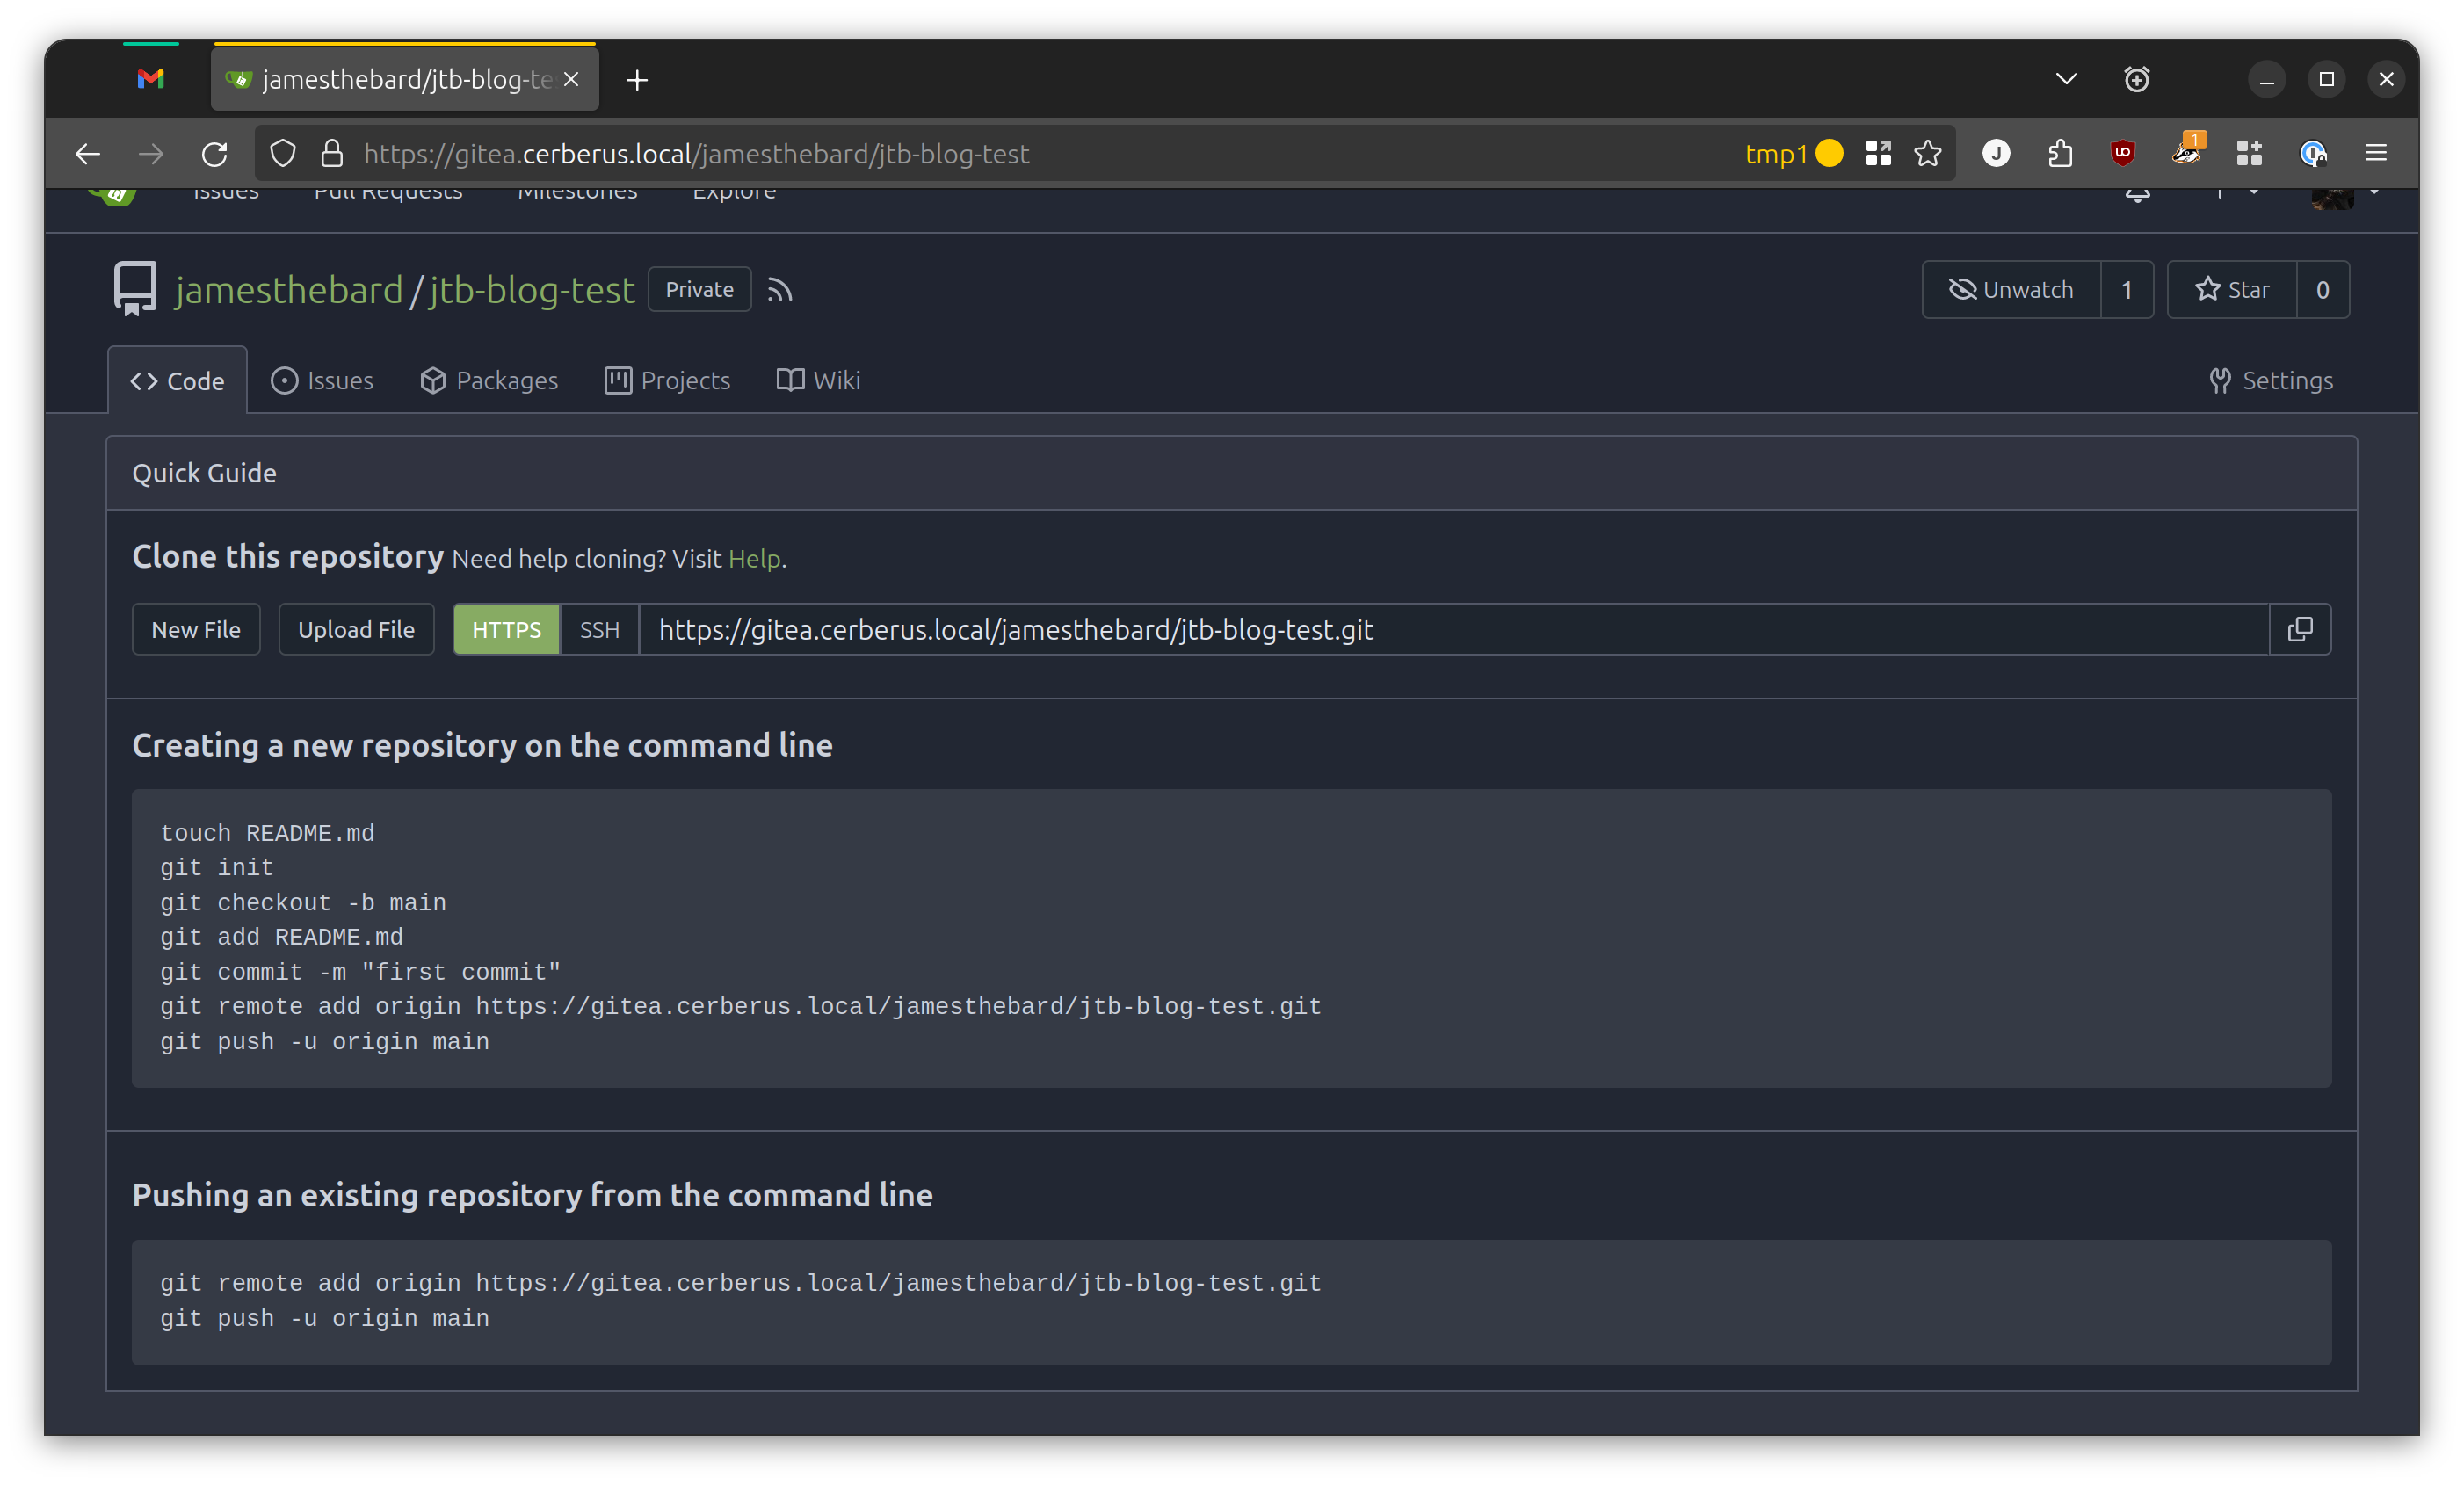
Then it was time to connect my local Git repository to the one I just made in Gitea. Fortunately, Gitea will tell you where you need to point the remote origin to when you’re setting it up. In the screenshot, just ignore the fact that the repo is called jtb-blog-test as you only get this screen before you push your stuff to the repo.
In the example below I’m using SSH to push and pull stuff from Gitea, but you can also use HTTP(S) as well. If you’re going to use SSH, make sure you’ve added your SSH public key to your profile in Gitea otherwise git will be very angry.
1
2
git remote add origin ssh://[email protected]:222/jamesthebard/jtb-blog.git
git push -u origin main
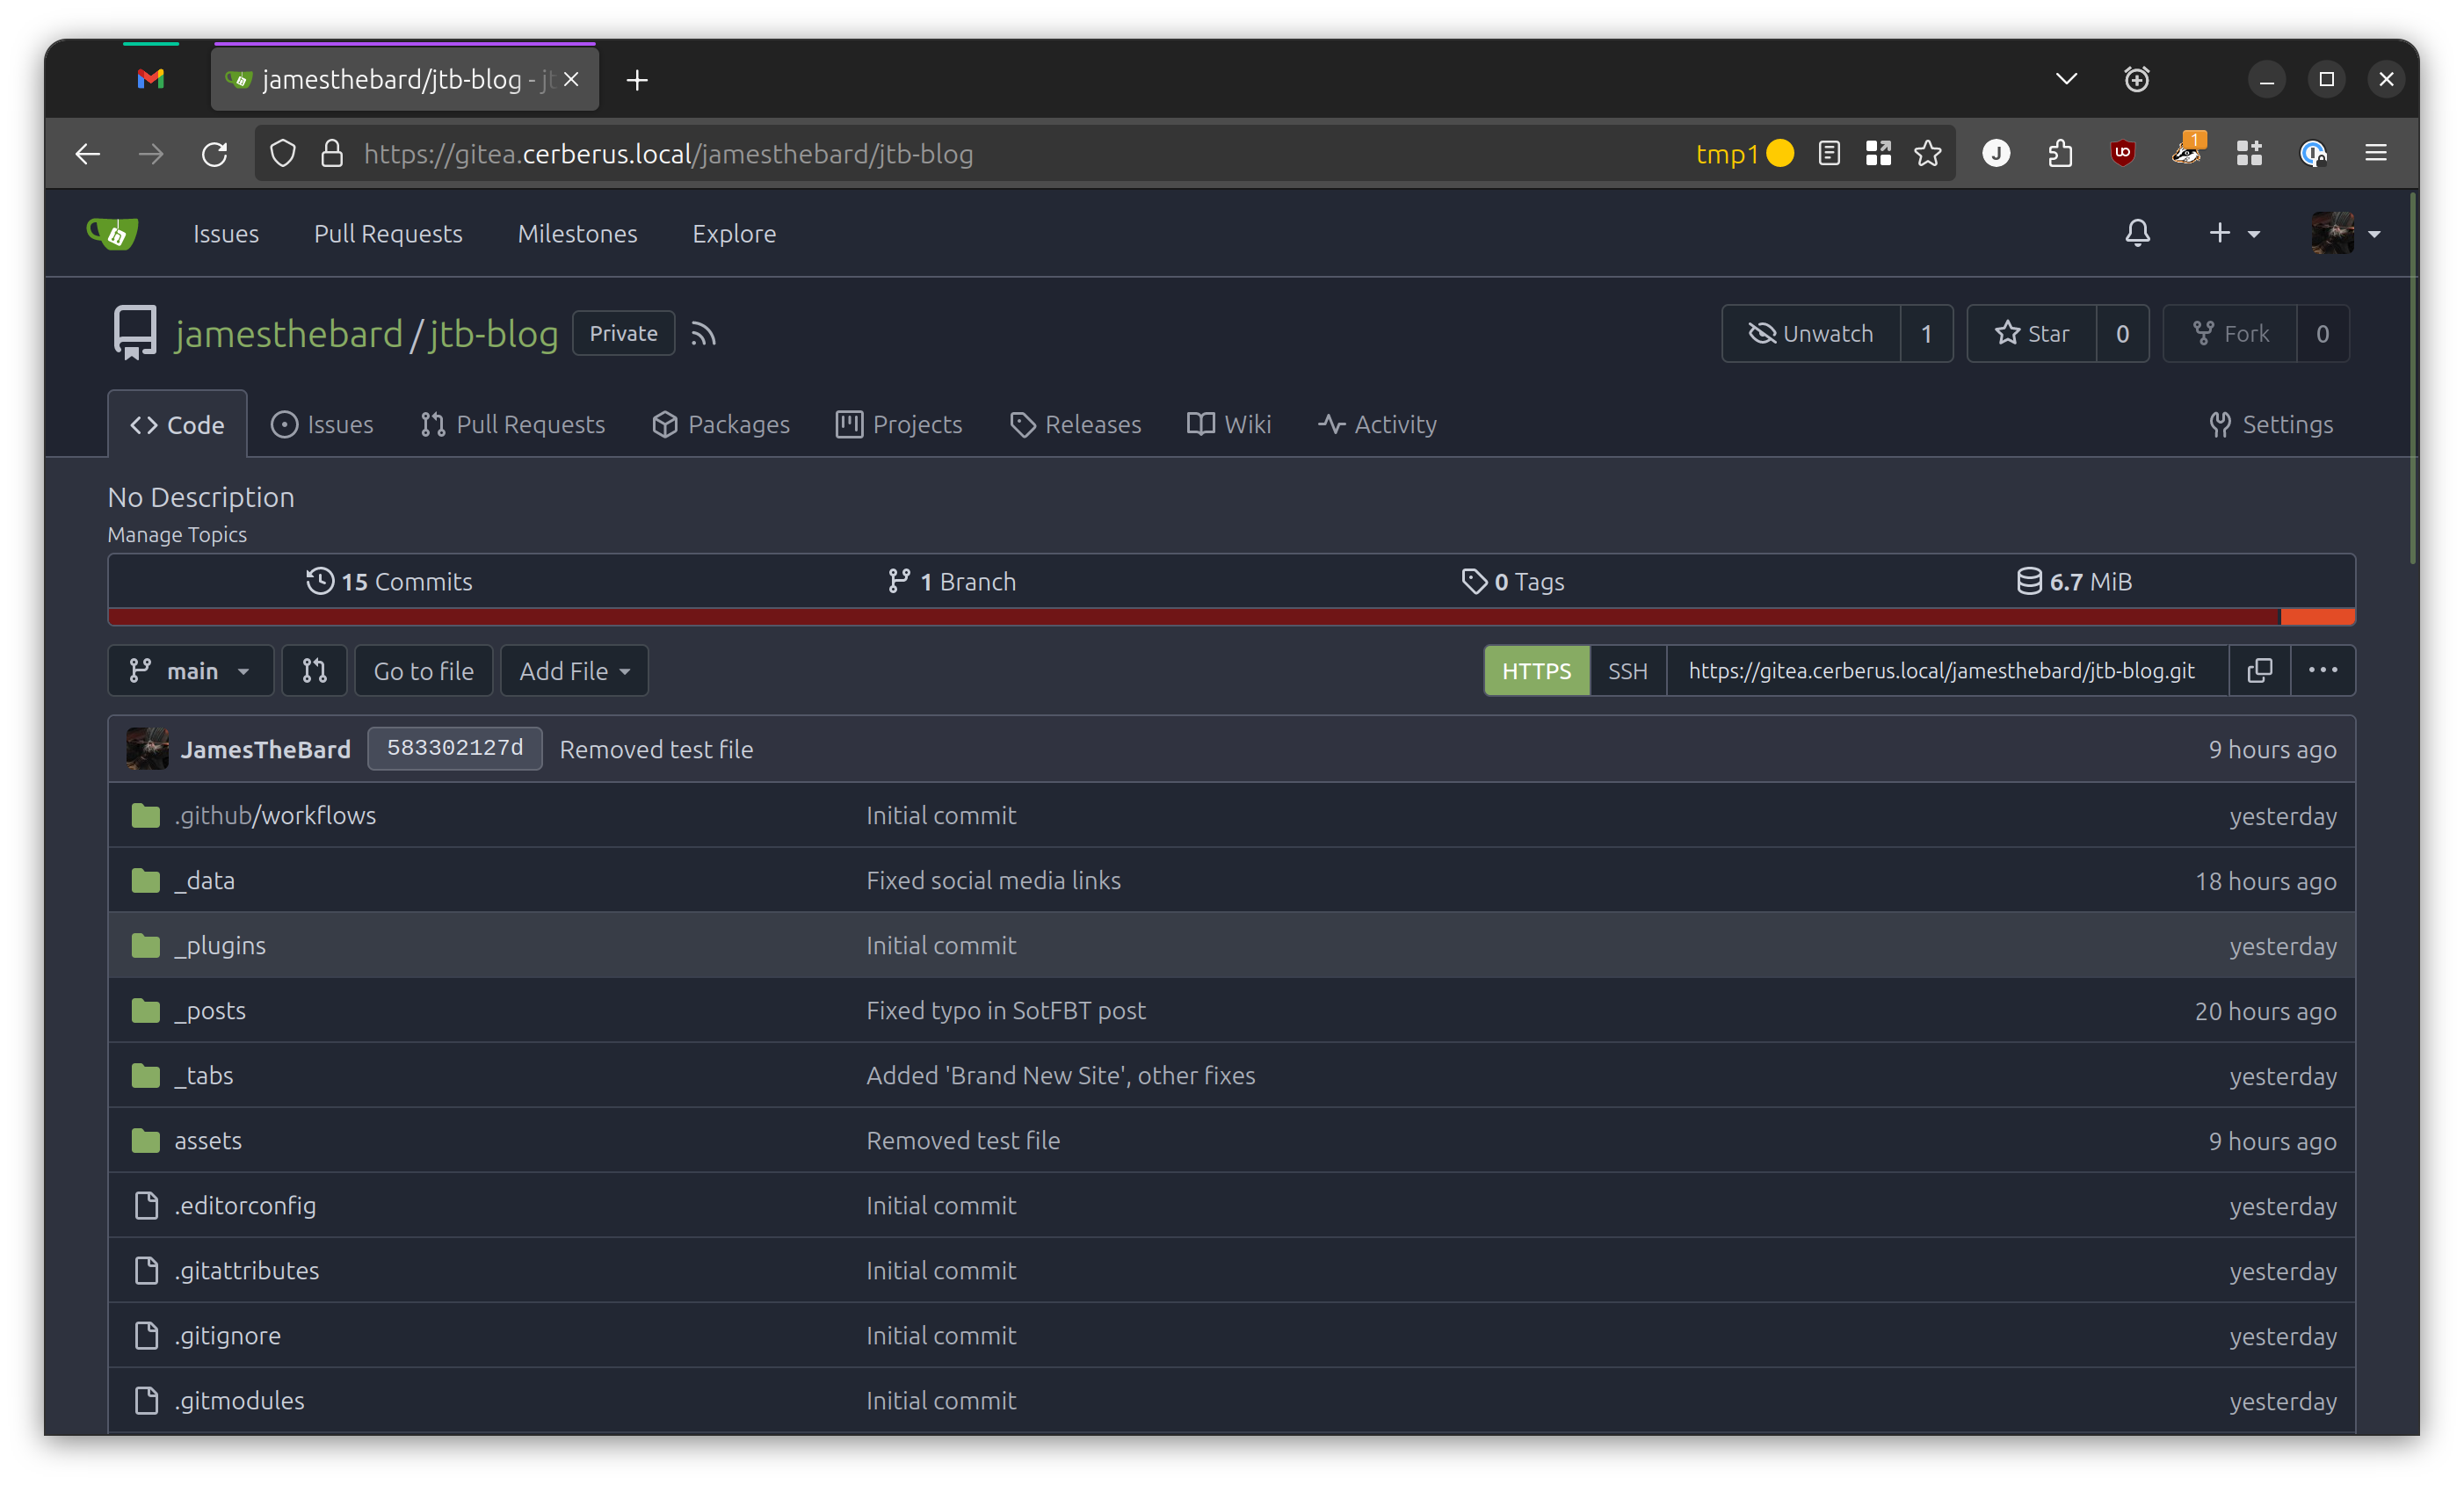
If everything goes smoothly, you’ll be rewarded with almost everything in your blog being magically copied over to the Gitea server! The reason I say almost everything is that there’s a .gitignore file in the Jekyll repo which tells git to ignore certain files like the _site directory which is where the final built website ends up. No need to track those files as you can just generate those with a simple command.
Updating the Boulder
I’m not very good with analogies, so I’m sticking with Sisyphus and boulders.
The Right Way
So, this is the point where my DevOps background comes into direct conflict with my laziness. What I usually do is:
- Create a new branch
- Write my post and commit my changes to that branch to make sure I don’t lose anything if something bad happens
- Eventually finish that post
- Verify that everything looks good and ensure everything is pushed to that branch
- Merge that branch back into the
mainbranch
1
2
3
4
5
6
7
8
9
10
11
# Create a proper branch
git create -b 2024-04-11-cool-new-post

# Do a bunch of typing and bloggering
git add .

# Add relevant Git commit messages
git commit -m "Added Gitea section, moved images to new folder"

# Merge 2024-04-11-cool-new-post into the main branch
git checkout main
The Usual Way
What I actually end up doing:
- Forget to create the new branch
- Just write stuff and not commit it to the branch I didn’t create
- Eventually finish that post
- Just push that shit to the
mainbranch
1
2
3
4
5
6
7
8
# Do a bunch of typing and bloggering
git add .

# Just add it:tm:
git commit -m "New post"

# ...and send it
git push origin main
Either way, I’m going to pick up at the “we made changes to the main branch” part. This seems like a good place to do some automation. From my workflow, if I’m pushing changes to the main branch, then I want that on the website stat. No questions, trust me, I know what I’m doing.1
Boulder Gets an Idea
So, what we need is something that will notice we pushed changes to the main branch, generate the website, and then copy it to the appropriate directory. After a ton of thought, I want something light-weight, easy to run in a Docker container, and doesn’t require much in the way of maintenance…
CTFreak
Fortunately, after some searching on the web2 I stumbled across CTFreak. I had never heard of it before, but it had everything I was looking for. Simple to use, had a Docker image, very easy to configure, and the words BASH SCRIPT radiating from the Several types of tasks section. It will do Powershell as well, I guess, but we are a bash household here.
So, while I’m using CTFreak there are a myriad of options that you could use in its stead. However, we’re gonna focus on this specific solution. Your mileage may vary.
So, I logged into my Git server and added a simple Docker Compose file:
1
2
3
4
5
6
7
8
9
10
11
services:
  ctfreak:
    image: jypsoftware/ctfreak
    container_name: ctfreak
    environment:
      - TZ=America/New_York # Set timezone used to schedule your tasks
    ports:
      - "6700:6700"
    volumes:
      - ./data:/data # Where to store all ctfreak data (logs, embedded database, config)
    restart: "unless-stopped"
Then, with the power of docker compose I brought it up without issue.
Building the Connection
Okay, the thing we’re going to use in CTFreak is the humble webhook. I mean, yes, you can use it to spam Discord and Slack and what-have-you, but let’s use it for a more constructive reason.
What we want to do is have Gitea let CTFreak know when we push a change to the main branch. We’ll do that by creating a webhook in CTFreak and then have Gitea call that webhook when that change happens.
A quick word of note: if you notice that the webhook doesn’t work when pushing your changes to the main branch, verify that your code doesn’t reside on a mountpoint that has the
noexecoption enabled. I’m not gonna say how I know this is an issue nor will I describe the hypothetical three days of beating my head against the wall trying to figure out why it wasn’t working…
However, we need a few things first…
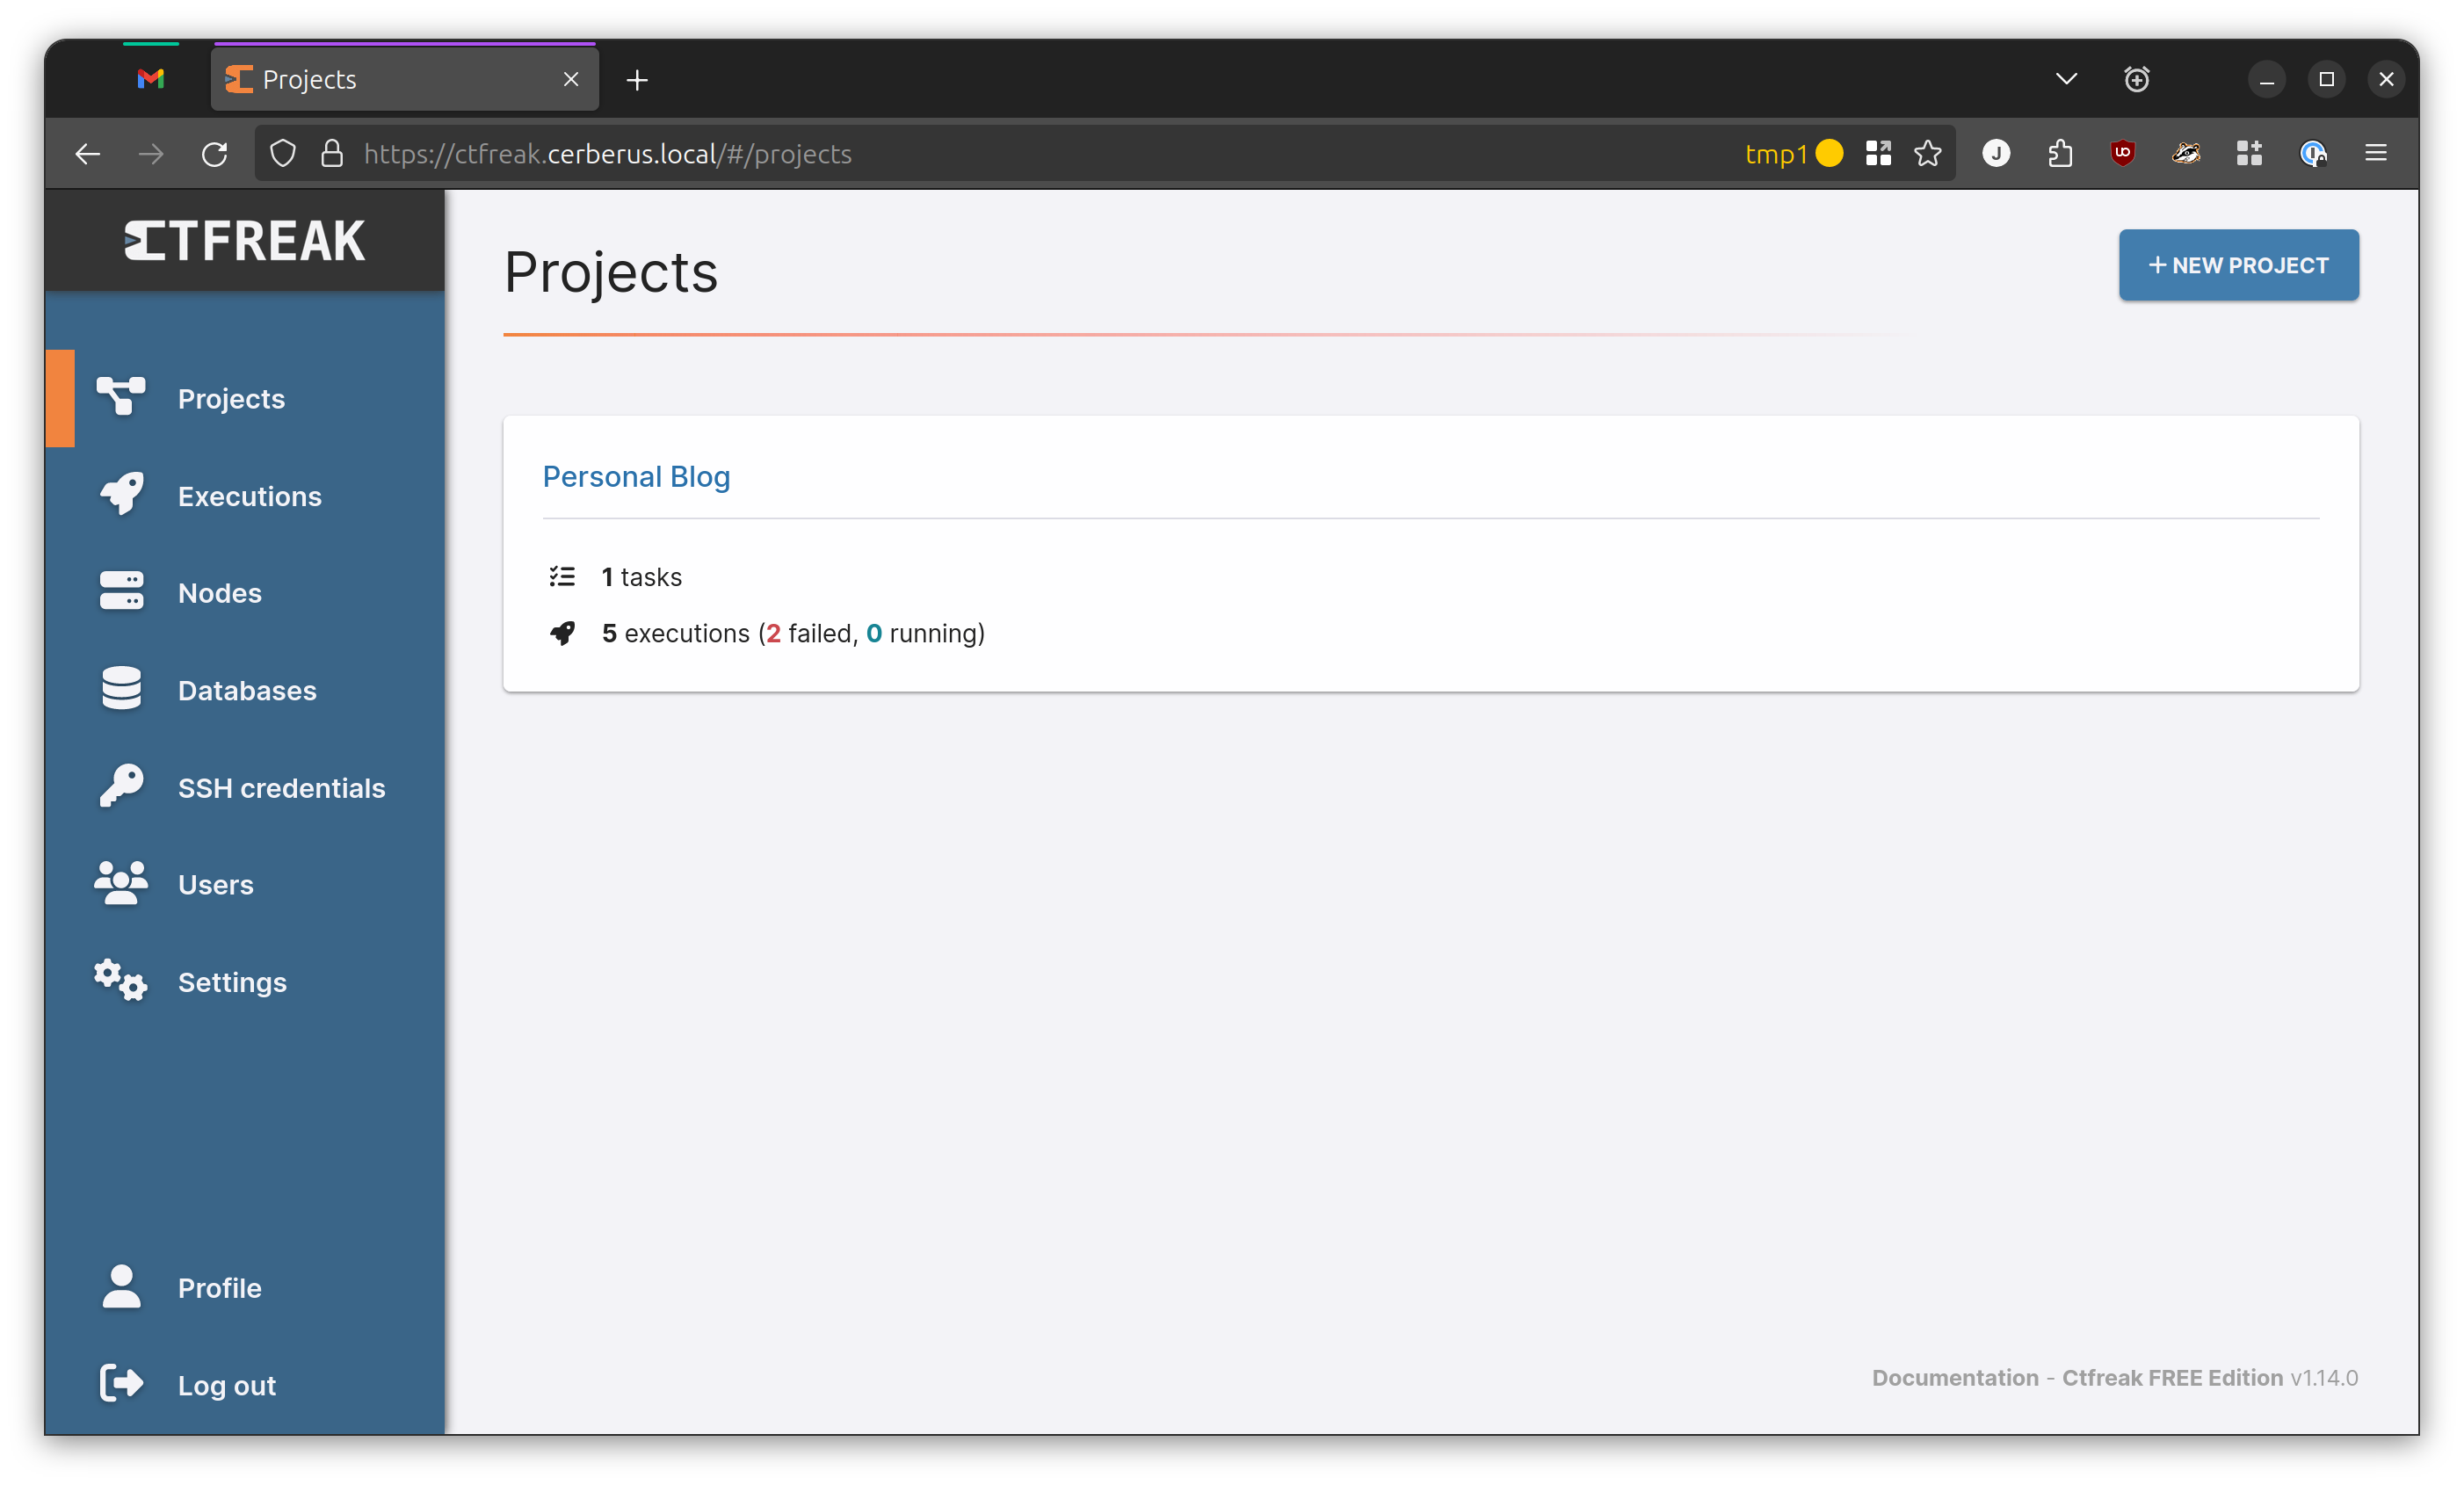
Our Frist Project
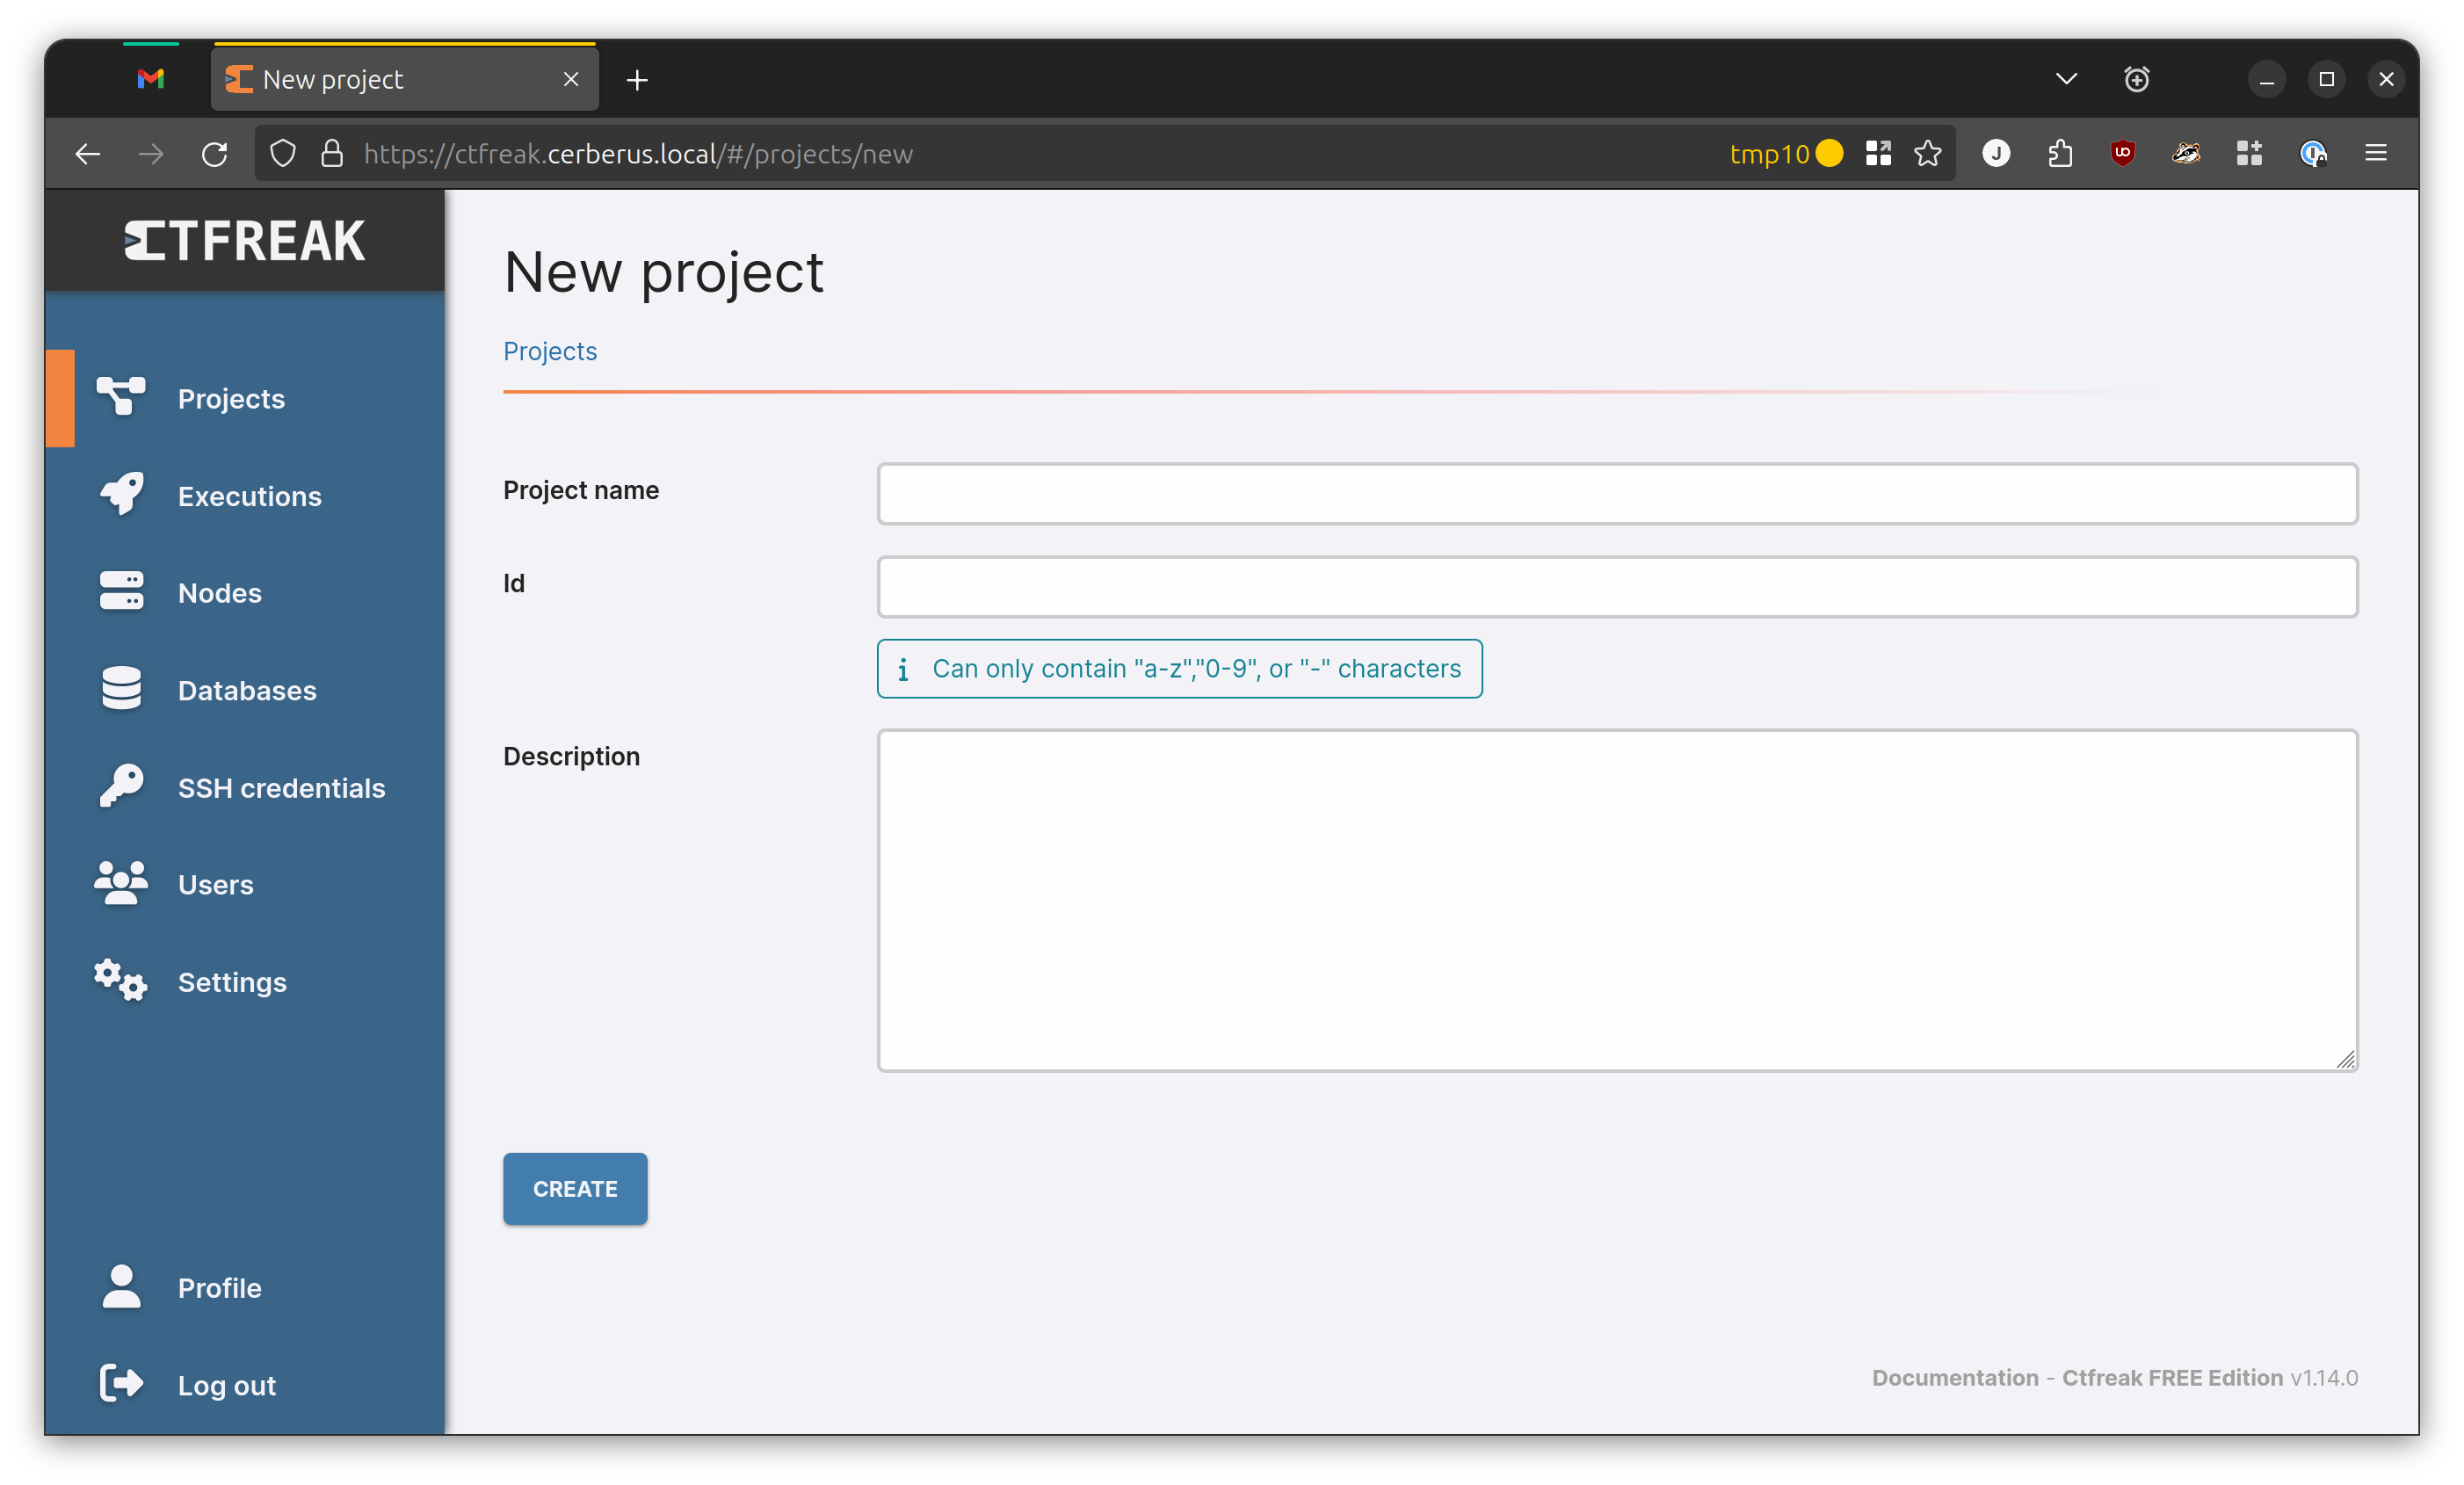
We need a project. I called mine “Personal Blog”, you can call yours whatever you’d like. It’s a canvas, paint whatever your heart tells you to. The ID I used was personal-blog because it complained about spaces or something. Maybe don’t go too crazy. I didn’t add a description.
After that just click Create.
Next up, let’s add a task by clicking on that New Task button, then on the beautiful BASH Script task.
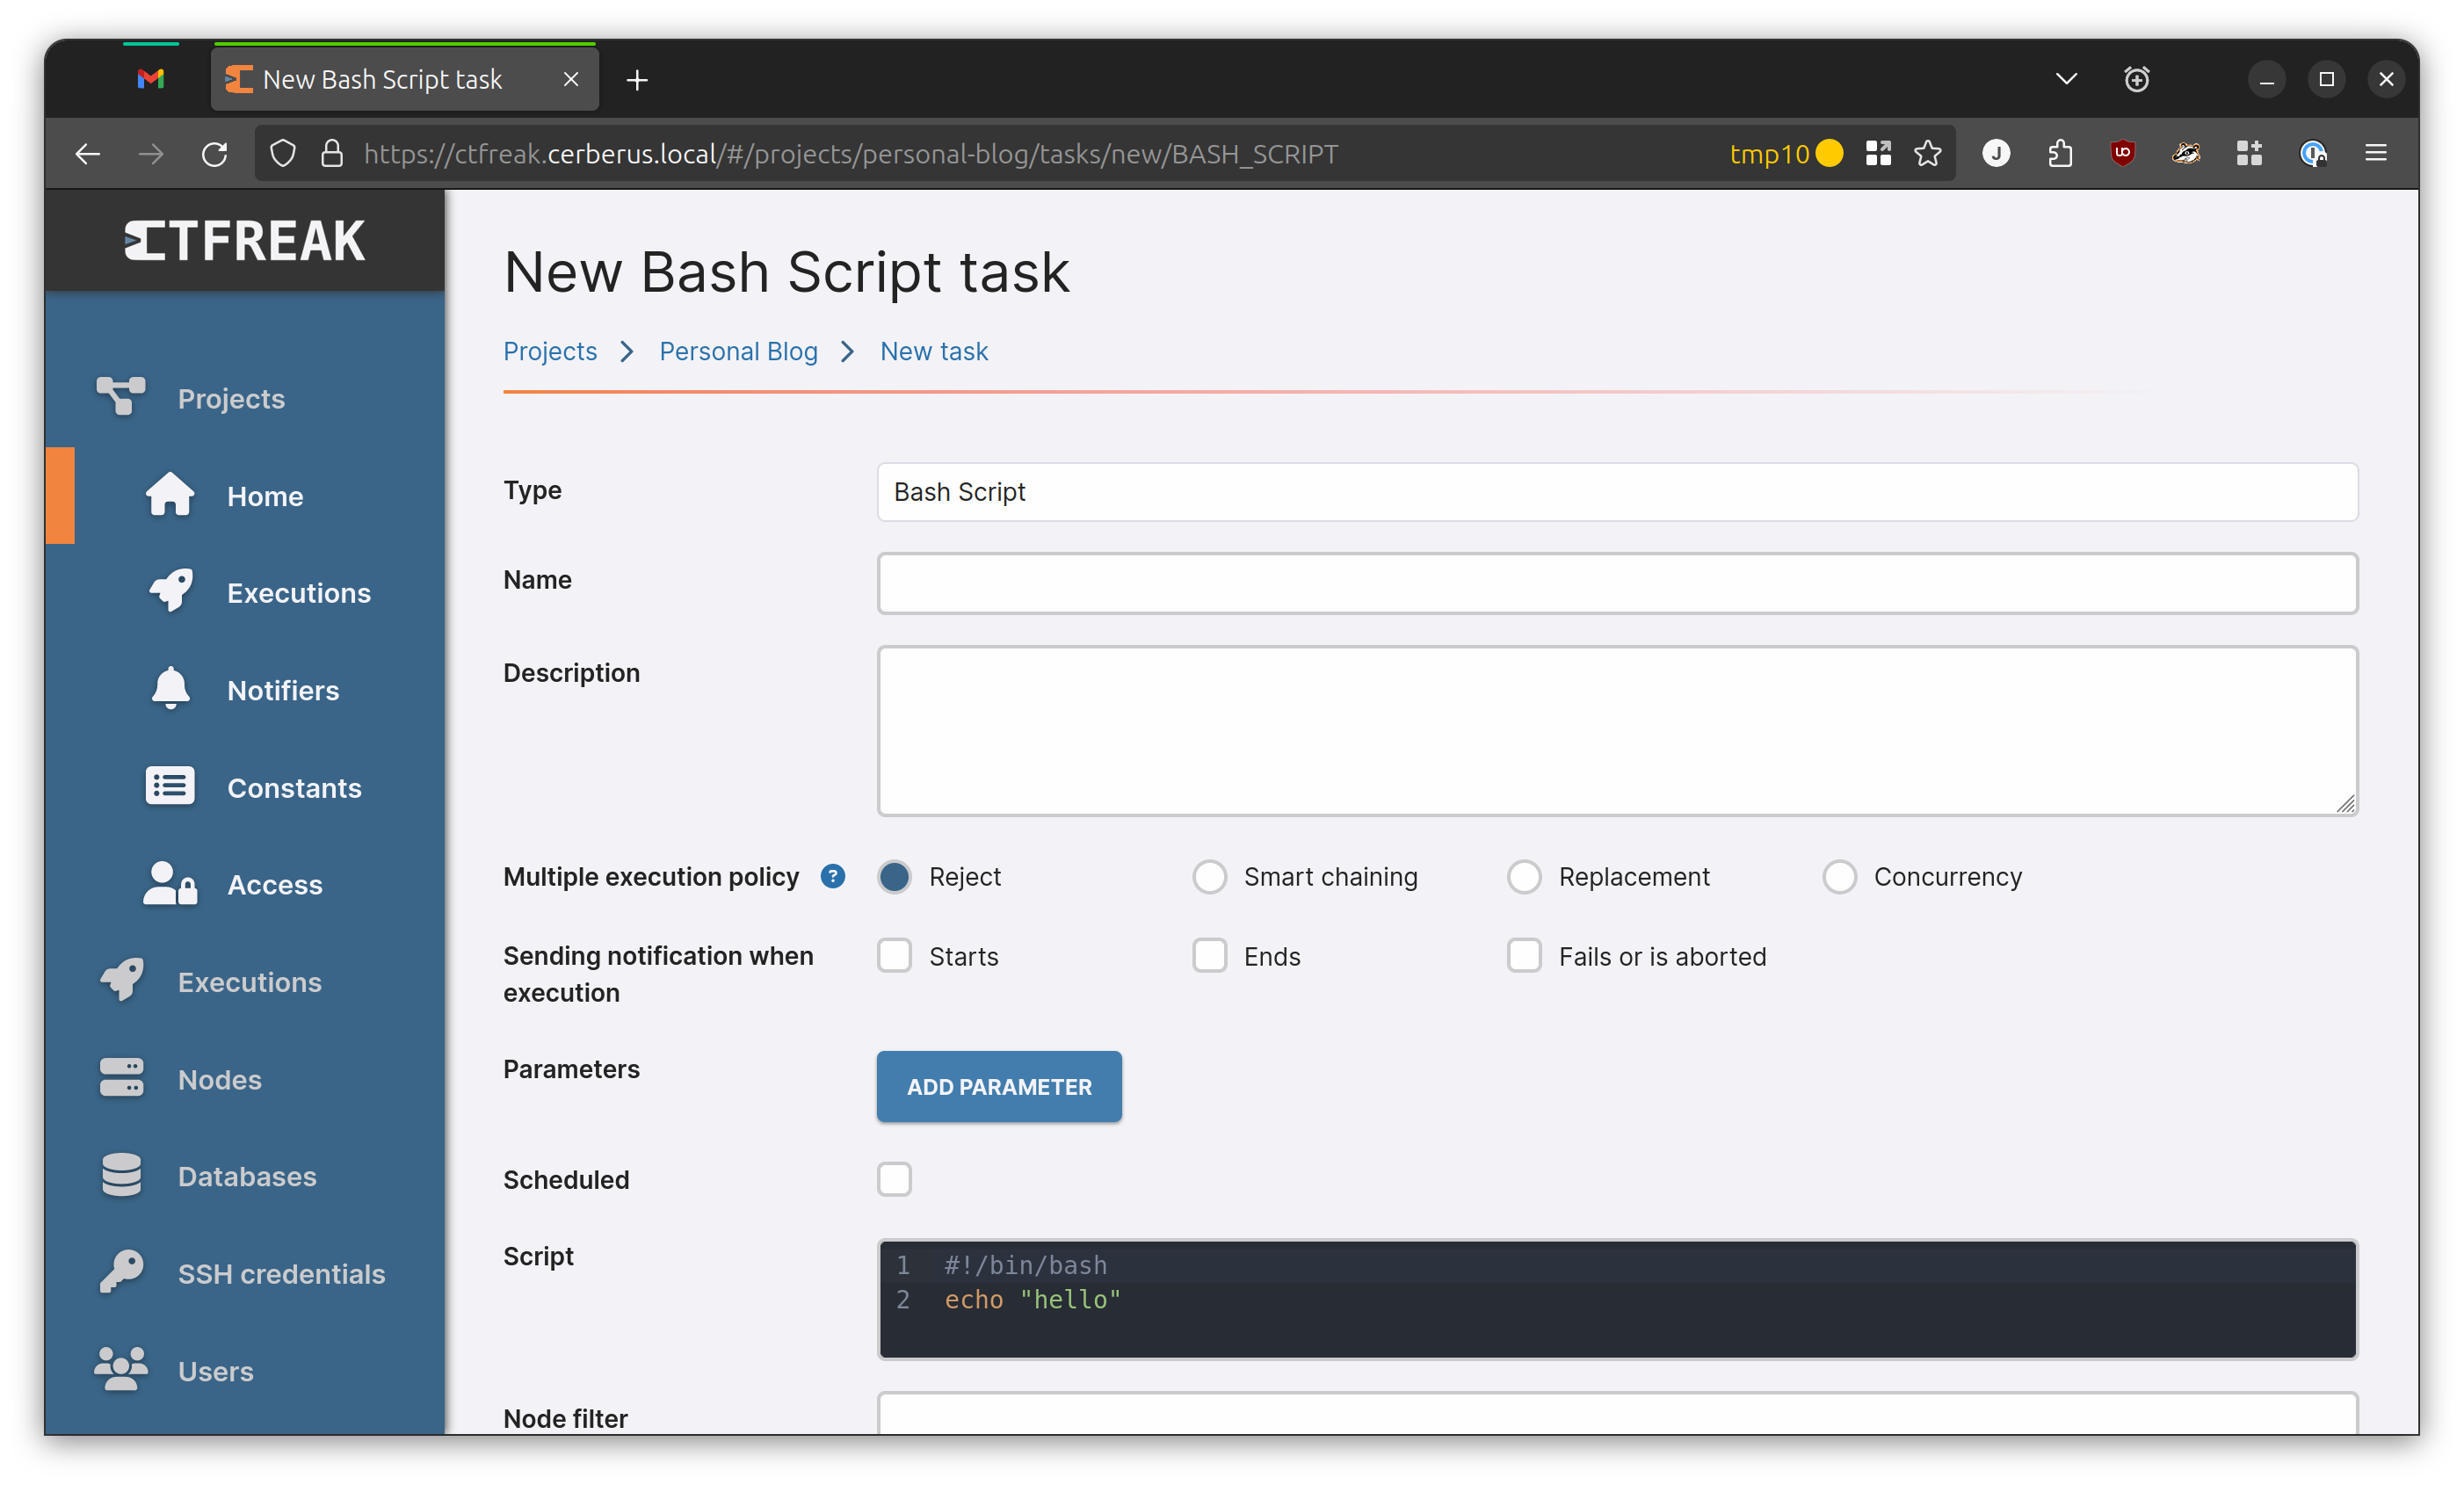
This is where we tell CTFreak what to do when we eventually get back around to that webhook. The things we really want to do are to grab the repo, build the site, and copy the built site to the proper directory. I tend to build the site on the server its going to live on as it makes things a bit easier.
For my setup, I already have all the ruby stuff setup, the Git repository is already on the server, so the only thing I really need to do is to pull the latest changes from the main branch, run the build command, then rsync it on over to the webserver directory.
This is what my bash script looks like for the task. My website lives in /var/www/html, and the code lives in my home directory because reasons. It’s complicated, quit asking questions.
1
2
3
4
5
6
7
#!/bin/bash
JEKYLL_ENV=production

cd /home/jweatherly/jtb-blog
git pull origin main
bundle exec jekyll build
rsync -avz --progress _site/. /var/www/html/
Once your script is to your liking, you can smash that Create button. We’ll need to come back to the task to tell it which node to run on.
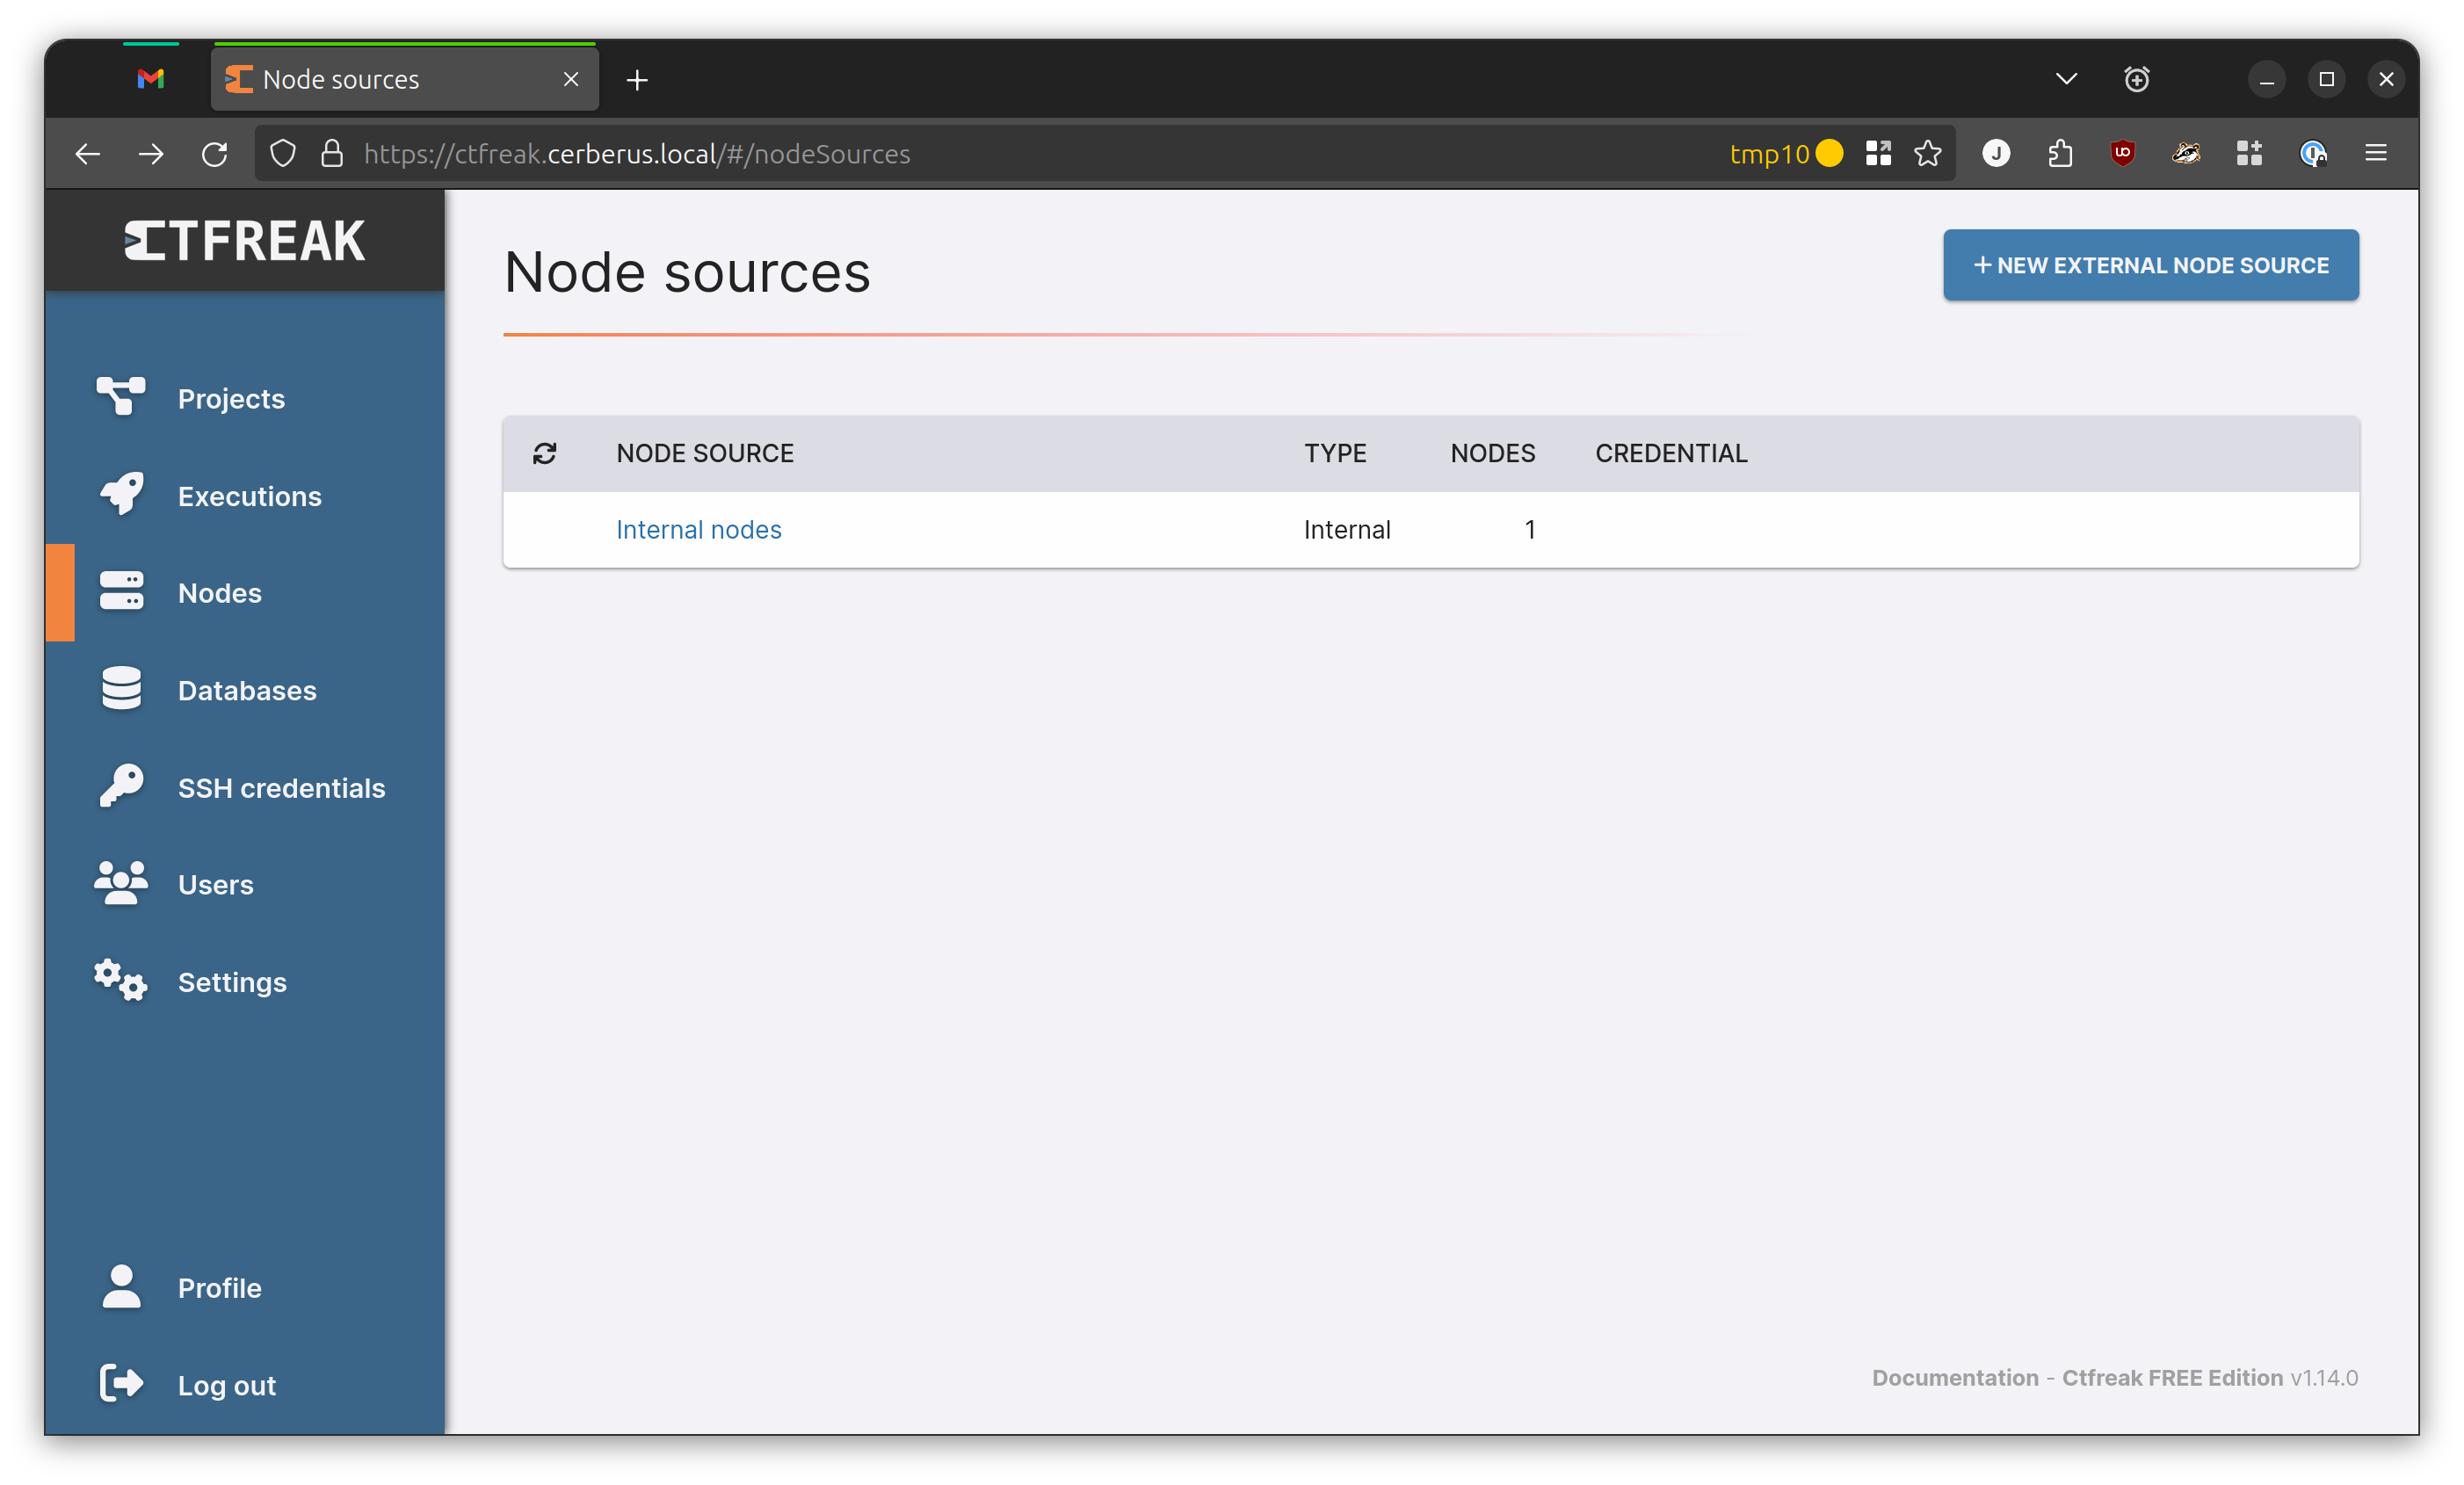
So, let’s create an internal node next! This is just CTFreak speak for “SSH into a local server”, and I need for CTFreak to SSH into the webserver to run those commands. There are several ways to configure authentication for a node, but I’ll leave that as a task to the reader. If you want to use SSH keys I’d recommend looking at the sidebar section called SSH Credentials.
For an internal node, go for the whole Nodes and don’t click on the New Node button. It’s horribly laid out, and you’ll want to click on the Internal Nodes link. I’m not a front-end developer or UX/UI designer, but I do know this isn’t ideal.
Once you click on Internal Nodes you can click on the New Node button. Fill out the information, and if you added a set of credentials to the SSH Credentials section they will appear here. Take note of the Tags section. I added the tag of #blog because that’s really the only thing it will ever do.
Now let’s head back to the task we made earlier. If you tagged your node (and you should have), go ahead and edit the task to add that tag. If everything is done correctly, it should say that there’s one node associated with that tag.
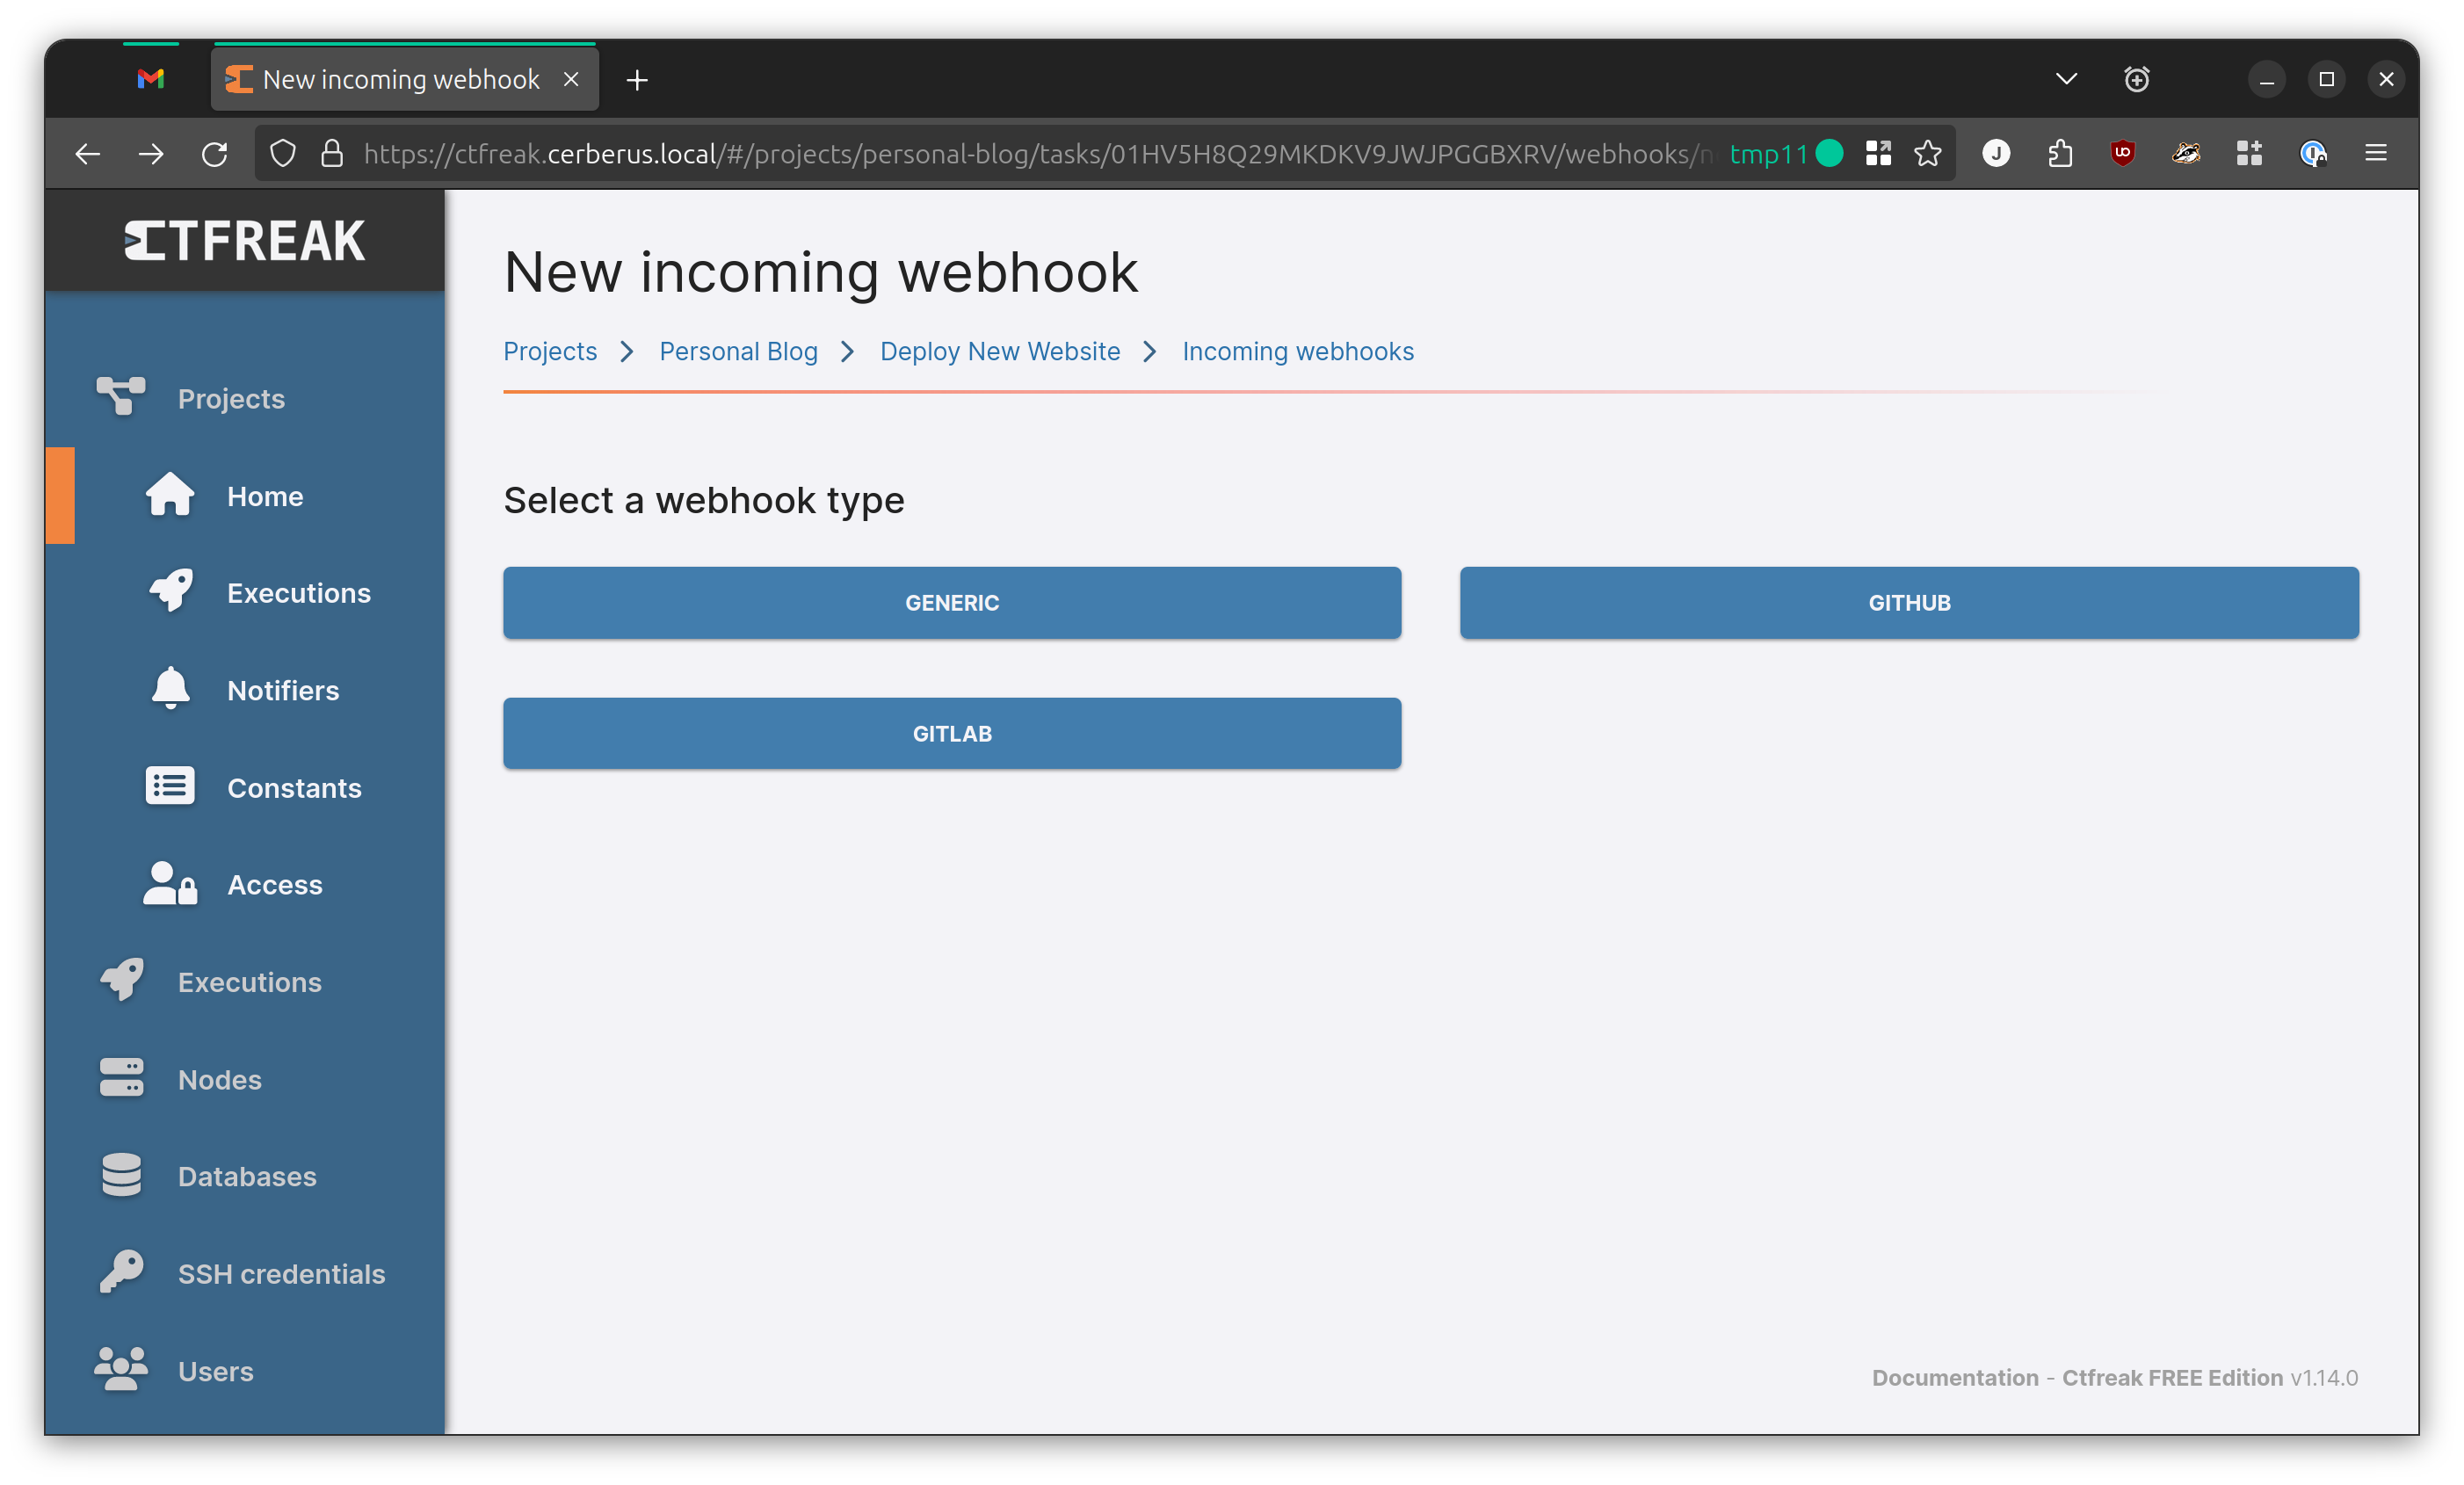
So, the first bit of glue: creating the webhook.
This is fairly straightforward. Navigate to the task, then click on Incoming Webhooks -> New Webhook. This will bring up a page that gives you three options. Since we’re self-hosting via Gitea, let’s pick the Generic option and move on.
Even better, the only things I did for this was give it a name and made sure it was enabled. We’ll let Gitea handle when it’s called so I don’t have to think about execution conditions and JMESPATH.
Do take note of the webhook URL as we’re definitely going to need that.
1
https://ctfreak.cerberus.local/wh/B9KDRxIbQeJfBeY8V8roQo0C42uMK9FW5Z4PRDl4e1G3rVYRWUchdpKzGuhX
This is not the actual link, I just replaced everything after the final
/with the output ofpwgen -s 60which makes a very convincing example URL.
Back to Gitea
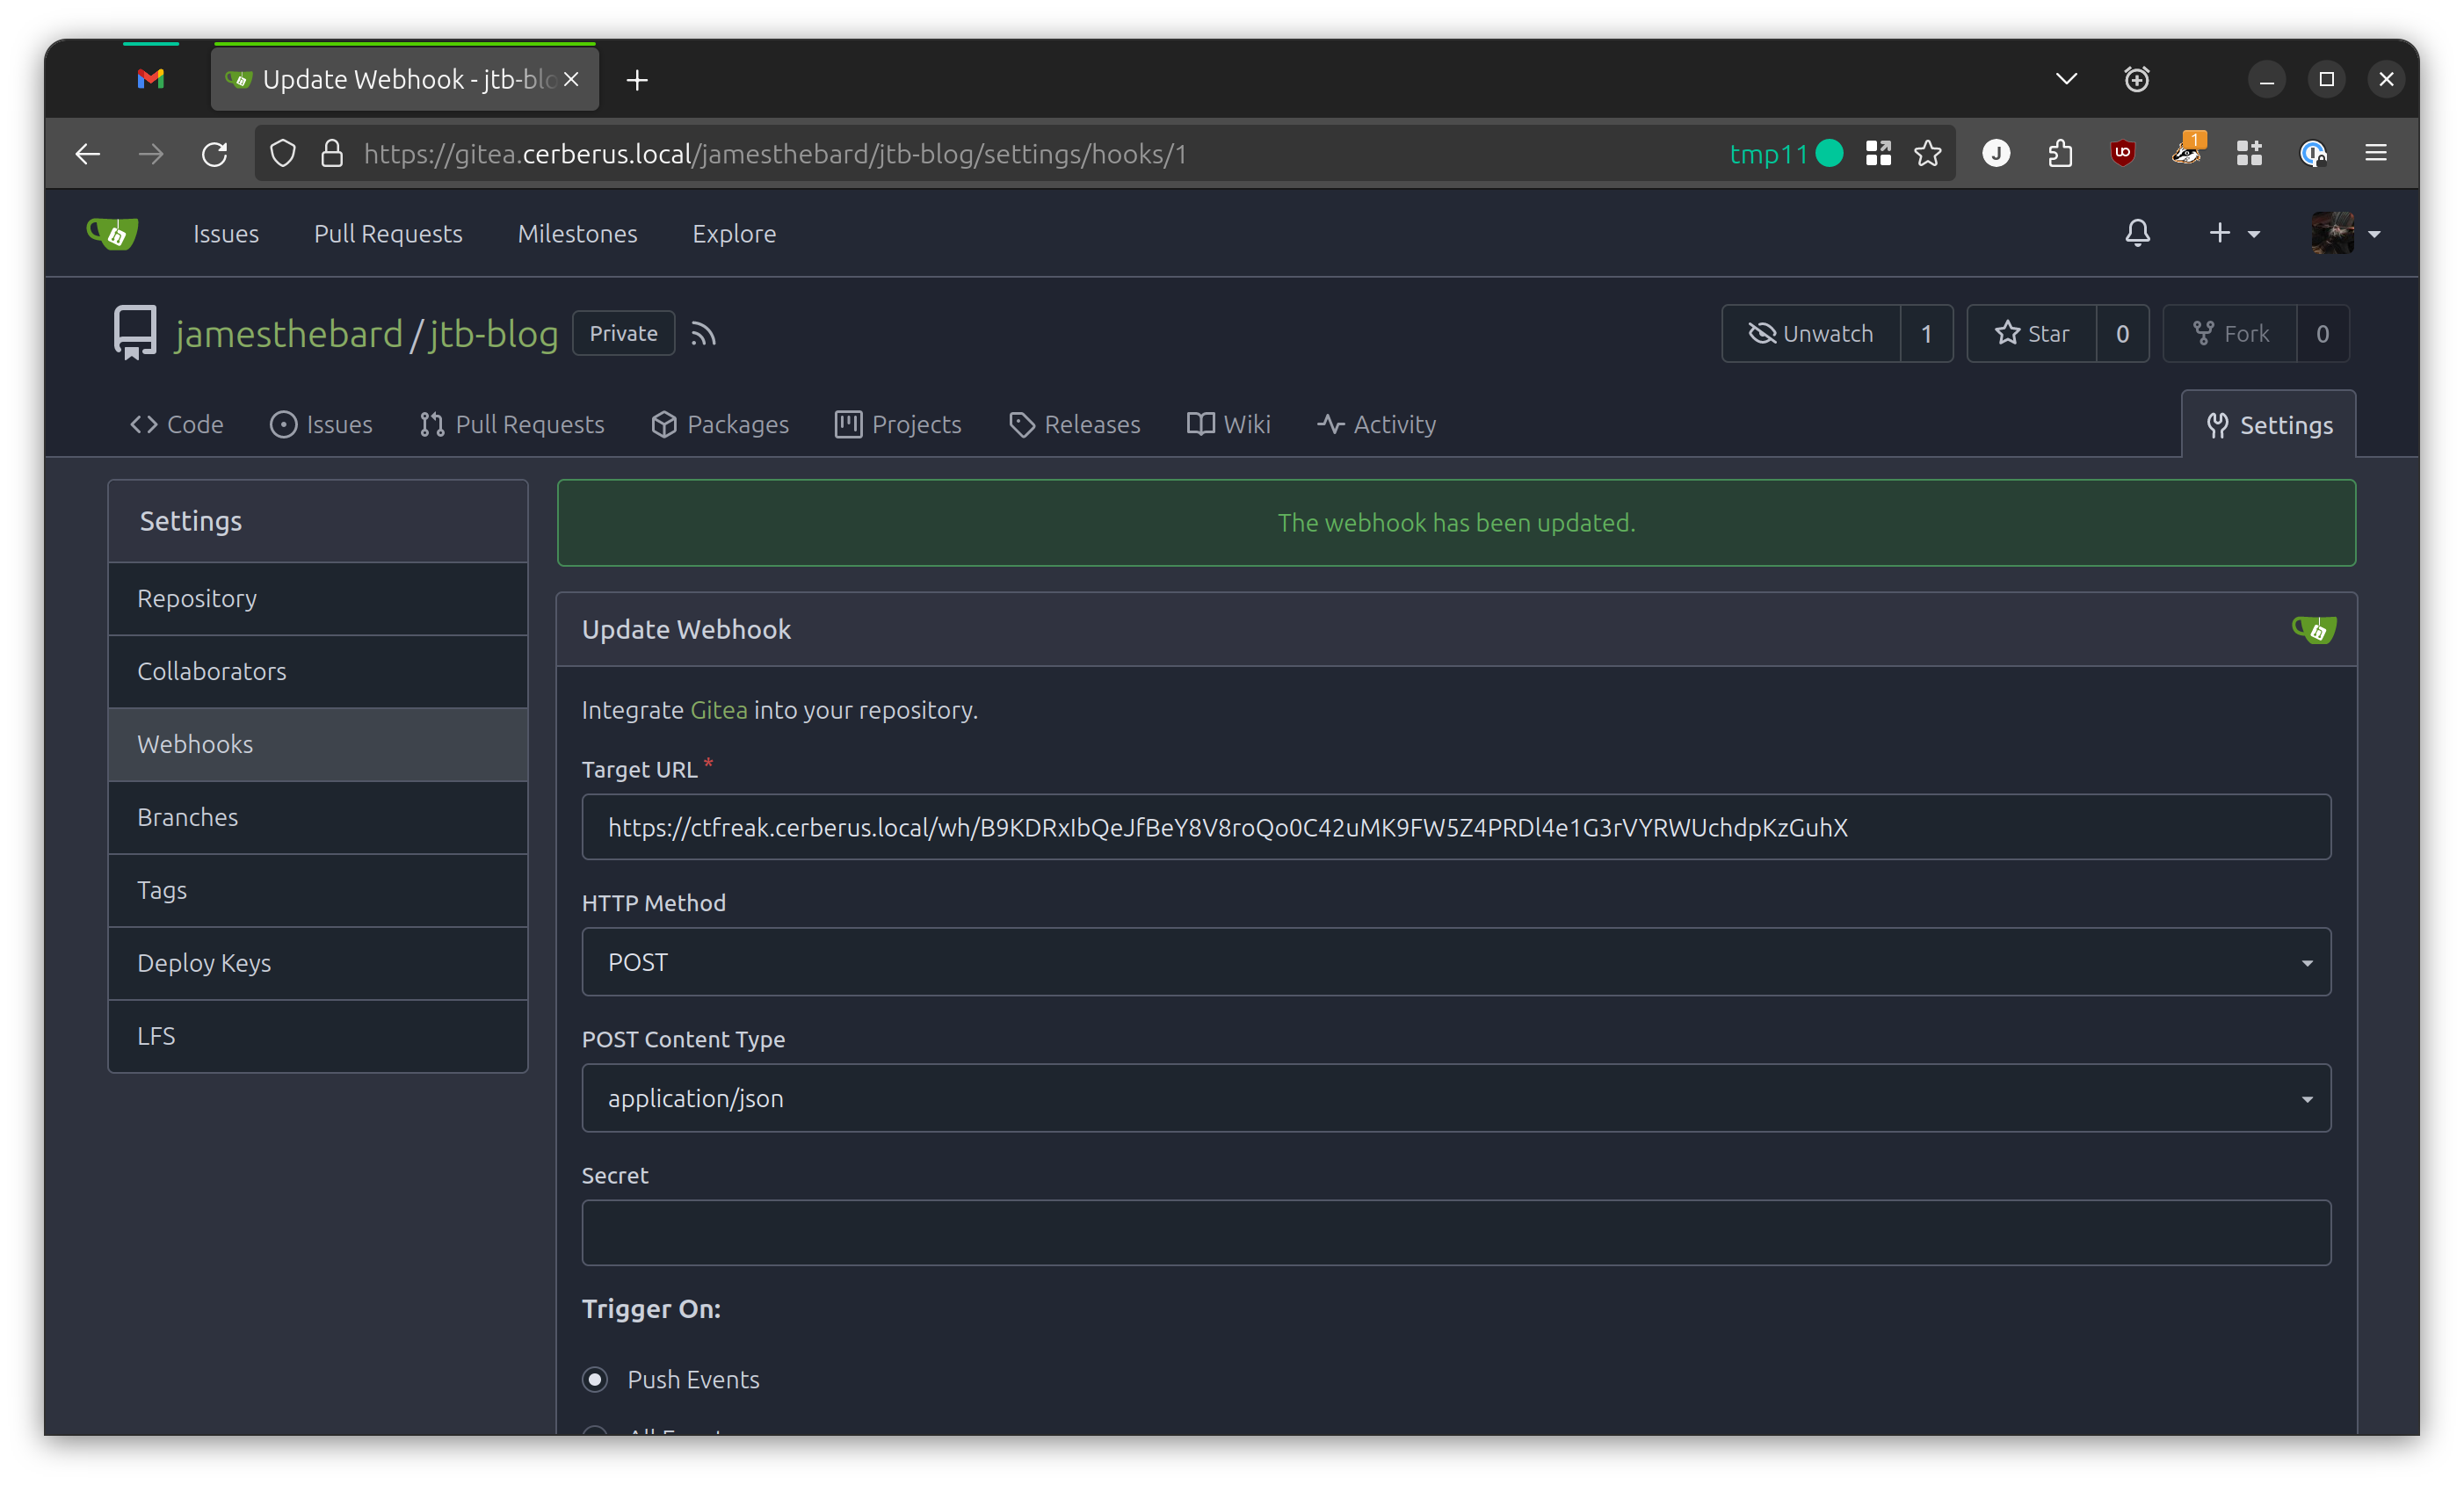
So, go to your blog repository, click on the Settings link, then on Webhooks on the right-hand side. You should see a button that says New Webhook which you should also definitely must click on yes.
The Target URL is the webhook URL. You can go with POST for the method if you’d like, and make sure that we’re triggering on Push Events.
The most important part: make sure you set the Branch Filter to main. This means that whenever we push stuff to the main branch, Gitea calls the webhook. This triggers CTFreak to run the task associated with the webhook which is to grab the changes, build the website, and then copy it to the correct directory.
If you notice something about the host not being allowed, it’s probably because Gitea is not very happy about that webhook. You’ll need to add
ALLOWED_HOST_LIST=*to theapp.inifile under the webhook section, or slapGITEA__webhook__ALLOWED_HOST_LIST=*into the Docker Compose file.
Conclusion
This is a pretty nice setup, not to complicated, and can be expanded upon if you want to do more stuff. It also lets me concentrate more on writing stuff instead of deploying changes to the webserver. Things like this seem more complicated than they really are, so I hope that this breakdown helps out and gives you a starting point for doing more fun/dumb stuff.